A paceline is a line of cyclists riding one to two bike lengths behind the rear wheel of the rider ahead, and learning how to ride a paceline comes down to four habits: hold a steady line, keep a predictable gap, say what you are doing, and share the work at the front. Most riders get comfortable in a single club ride, and the smoothing-out takes a season of regular group miles. This guide covers the whole sequence, from waiting at the roadside to roll your bike through to peeling off the front for your own turn.
Drafting is why the exercise is worth the nerves. Tucked into clean air behind a rider, a cyclist can hold a speed and a duration they could never manage alone, which is exactly how a mixed-ability group stays together. The safety side is the part nobody advertises: a line of riders is only as good as the predictability of the person in front of you. Get that right and the rest is mechanical. Updated for 2026.
Table of Contents
- What You Need
- Bike and kit
- Ride information to ask about
- Rider preparation
- Step-by-Step: How to Ride a Paceline
- 1. Check the Ride and Ask the Group Leader
- 2. Choose a Predictable Position: Where to Sit When You Ride a Paceline
- 3. Match the Group Speed and Hold Your Line
- 4. Communicate Clearly and Predictably
- 5. Rotate to the Front Without a Surge
- 6. Ride Echelon Safely
- 7. Leave the Paceline Safely
- Common Mistakes and How to Fix Them
- Overlapping or half-wheeling
- Surging back onto the wheel
- Riding with no escape room
- Sudden, uncoordinated braking
- Going silent at the wrong moment
- Blowing up on the first pull
- Five drills that build the habit fast
- Frequently Asked Questions
- How much space should I leave between bikes in a paceline?
- Can beginners ride in a paceline?
- How do cyclists rotate to the front?
- What is an echelon formation in group riding?
- How do I join a paceline without causing a surge?
- What should I do if I fall or become separated from the group?
- Conclusion
What You Need
Before you join any line, you need three things settled: a bike that will not become someone else’s problem, a clear idea of what the ride is, and enough flat-road confidence to ride one-handed at speed without wobbling.
Bike and kit
A road helmet that fits, road shoes if you own them, and a bike with recent brake pads, fresh tyres and a chain that does not skip. Bring a spare tube, a mini pump or CO2 inflator, a multitool, water and enough food for the planned distance. Carry a phone and your details on it, and make sure someone in the group knows who you are.
Wear something you can see. Bright or contrasting kit helps drivers judge your intentions, and gloves plus padded shorts matter more than most people expect on a first long line.
Ride information to ask about
- The planned pace, in mph or kph, and the total distance and riding time
- The route, regroup points, and whether the group splits at any point
- Whether the group rotates, and how long each pull should last
- The fastest expected pace and the average skill level of the group
- Whether there is a sweeper or designated front and rear riders
Ask the ride leader directly before you roll. Riders who know the plan ride calmer, and a leader who knows you are new will slot you somewhere sensible rather than leaving you to guess.
Rider preparation
Do one or two solo rides at your target group speed before you join a line. The speed that feels hard alone should feel comfortable on the day, because a paceline gives you a tailwind but not a free pass. Ride a short club or shop ride first if you can, and pick a group that advertises a beginner-friendly or no-drop pace for your first outing.
Step-by-Step: How to Ride a Paceline
The sequence below is the working order. Read it once before the ride, then focus on steps 3 and 4, because holding a line and communicating clearly are where nearly every crash starts.
1. Check the Ride and Ask the Group Leader
Confirm the pace, the duration, the regroup points and whether rotation is expected before you join the line. Knowing that the group rotates every 30 seconds changes how you pace the first five minutes, and knowing that it does not rotate changes them just as much.
Say out loud that it is your first paceline if it is. Most groups will put you behind a steady rider and quietly keep the pace honest for a few miles, and that kindness is worth more than any amount of advice you can read beforehand.
2. Choose a Predictable Position: Where to Sit When You Ride a Paceline
Join at the back and stay there for the first few minutes. A mid-line entry looks faster but it forces the whole group to change rhythm to absorb you, and a rider who joins from the side at speed is exactly how a group splits apart.
Pick your position based on three things: how much riding you have done this year, how well you handle a bike one-handed, and what the road is doing. A weak climber sitting third wheel sets an unsustainable pace on the ramp. A new rider in the middle of a group that splits around a roundabout has nowhere to go. Sit at the back until you have read the group.
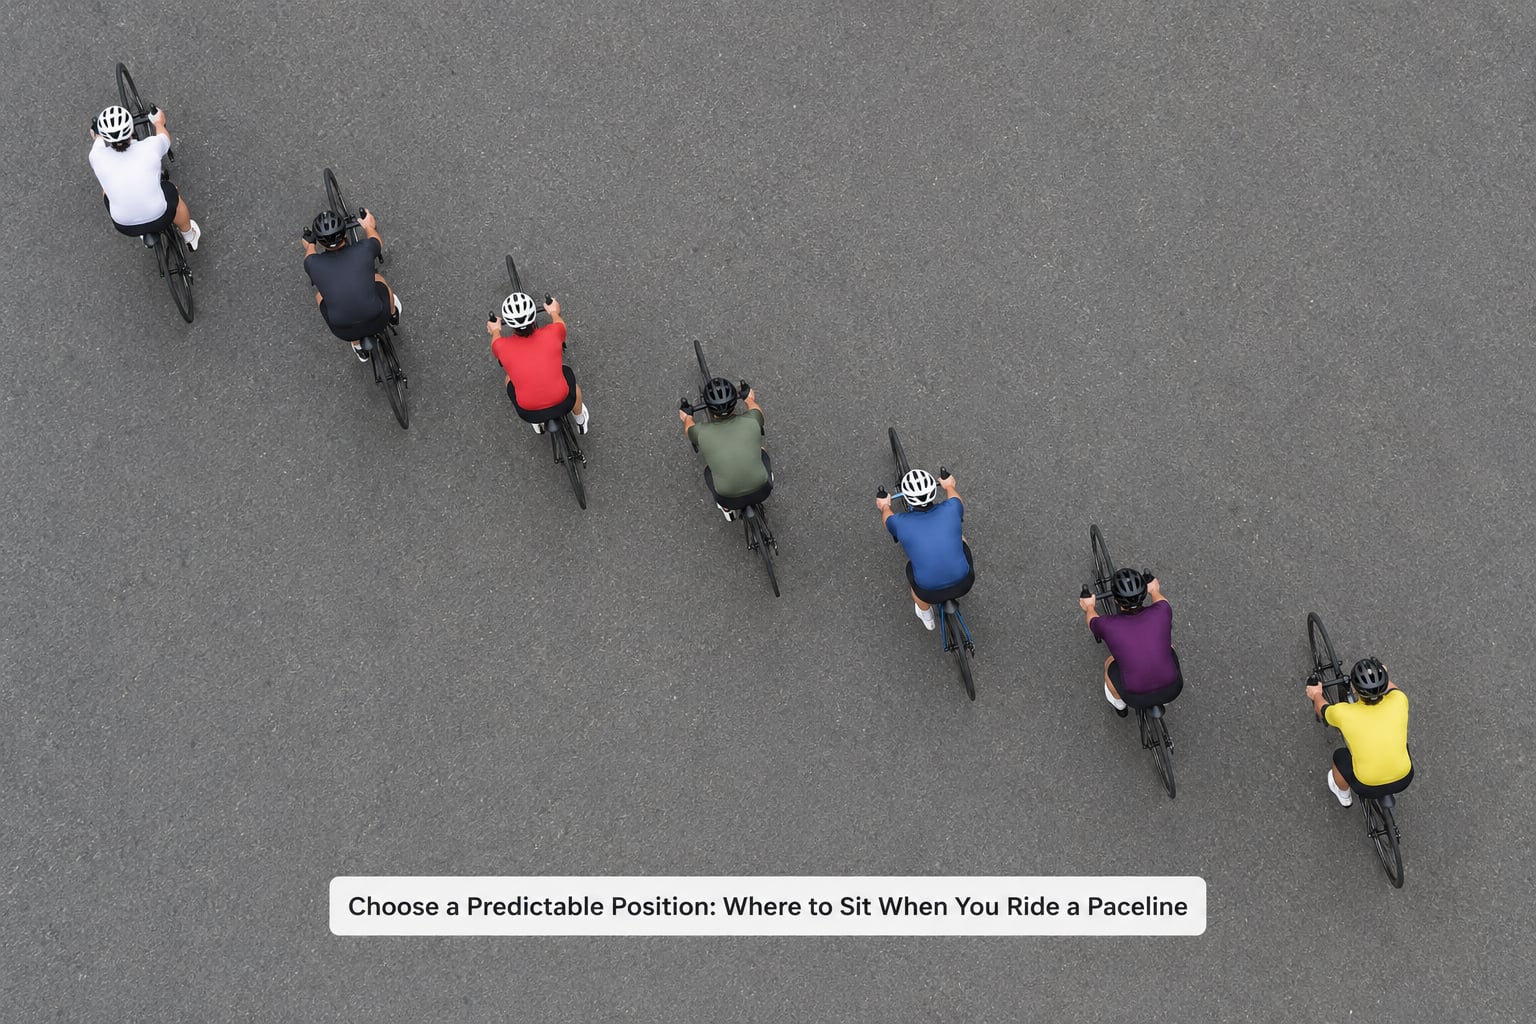
The vocabulary for those positions is worth learning, because riders will use the words out loud:
- Puller. Sits at the front, sets the pace, and takes the full force of the wind. Every rider ahead of the line is waiting on this person’s legs.
- Second wheel. Shields the puller as much as possible, watches the road two or three riders ahead, and calls the hazards the puller cannot see yet.
- Third wheel. Shields the second wheel, sits in the smoothest air, and is the usual starting point for a rider moving up.
- Half wheel. Half a bike forward, tucked close to the wheel ahead for maximum draft. It breaks the rhythm of the line and is a sign the rider should hold station instead.
- Bricoleur. Off to one side and slightly back, usually the strongest rider or the person collecting stragglers. They do not pull every turn.
- Catcher. The last rider in the line, responsible for noticing gaps opening behind and for telling the group when riders are being strung out.
- Caboose. The rider you follow after your turn at the front. Your target when you come off, and the position that gives you the full draft on the way back.
3. Match the Group Speed and Hold Your Line
Hold one to two bike lengths of gap and never overlap the wheel in front of you. Longer than that and you lose most of the draft; shorter and you have no room to react if the rider ahead makes a mistake. Overlap is the single fastest way to end a group ride on the ground, because your front wheel and their rear wheel are in the same slice of air.
Settle into a cadence you can hold and match the group’s speed rather than their pedal rate. Big riders have a slow, smooth cadence and small riders spin fast; the line needs one steady speed, not one stroke rate. Keep your hands on the brake hoods or the curved drops, elbows bent, and use one hand briefly when you signal or drink.
Look two to three riders ahead, not at the wheel directly in front of your nose. The wheel in front of you is already reacting to whatever it saw. When you look further up the line you see the hazard before it reaches you, and you have time to make your own move instead of copying someone else’s panic.
On descents, through gravel and in the rain, open the gap to three or four bike lengths and smooth everything out. On a climb, hold a tight wheel and let the group choose the pace rather than testing the steepest gradient you can find.
4. Communicate Clearly and Predictably
Call what you are doing, before you do it. A short, loud, unambiguous call travels down a line better than any hand gesture, and it gives the riders behind you time to act. The most important call in cycling is the one that starts with the word on, because it tells everyone to move to the same side at the same moment.
Keep your head up and your voice on. Signal, then look, then move. One rider calling at a time; if two people shout conflicting instructions, the worst option becomes the group’s default.
- Calling “on” plus a side. Announce which way you are moving before you pass, so the whole line knows to move together.
- Open palm held up. Slowing down. The group reduces speed in stages, rider by rider, not all at once.
- Waving or pointing down and across. Hazard in the road, such as glass, gravel, a pothole or debris.
- Finger and thumb together, waved side to side. The group is splitting or strung out; ride through and make contact with the front riders.
- Hand on the hip, elbow out. Signalling that the rider ahead of you needs to come through the line.
- Repeated “car” or “car back”. Traffic approaching from behind, so the group moves off the line and gives the driver room.
- Waving one rider back. Used by the catchers to bring a straggler forward to the line.
5. Rotate to the Front Without a Surge
Move up when the line is steady, one rider at a time, and only after the riders ahead have settled. Ease onto the wheel from behind rather than attacking it, and only move when there is room. If nobody in front is moving, hold your station and try again in a minute; forcing your way up is how a fast group becomes two slow groups.
Announce your intention so the rider you are passing knows you are there, and accelerate only as much as the gap needs. Then take your pull at the group’s speed, not your own. A pull is not over when you come off the front, it is over when you are back on the caboose wheel, which is why the last 20 seconds of your effort are the hardest part of the rotation.
Come off the front, move outward rather than across, and let the next rider take your slipstream. Keep pedalling smoothly all the way back down the line instead of coasting through it, because the recovery is what keeps you in the group for the rest of the ride.
6. Ride Echelon Safely
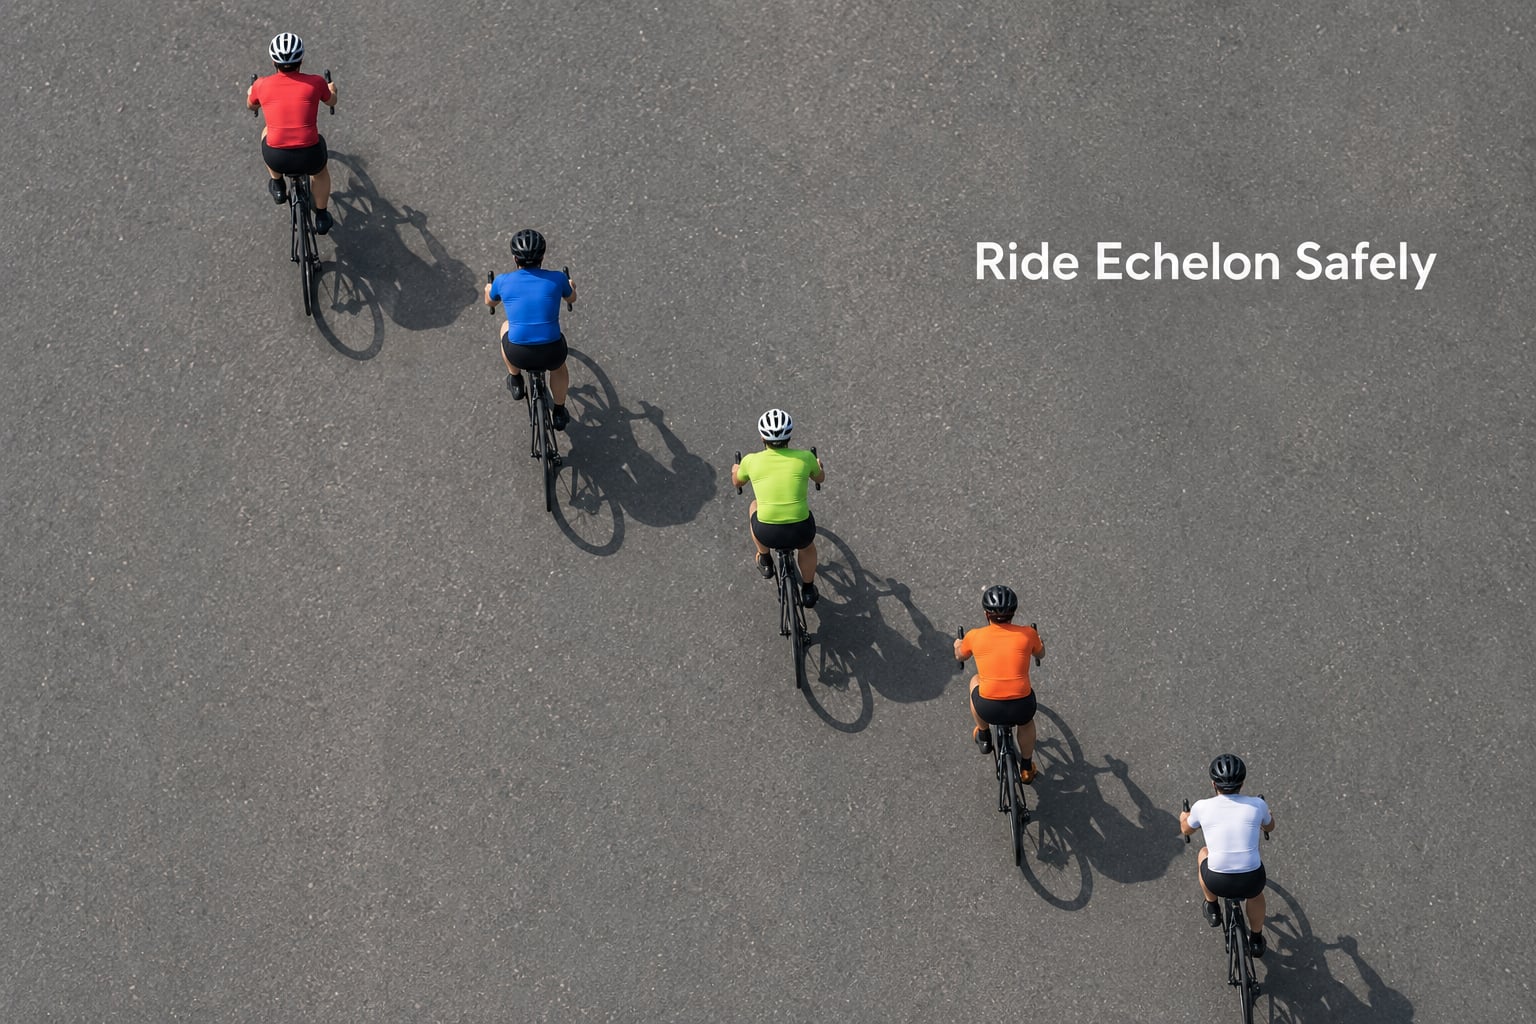
An echelon is a staggered formation where each rider sits slightly behind and beside the wheel ahead, so everyone shares the wind rather than sheltering behind one rider. It is the normal formation for a fast club ride in a crosswind, on a wide open road, and in rain, because riders tucked directly behind a wet rear wheel get spray in their face.
Set it up by moving up one place at a time and then drifting half a bike forward and to the side, staying clear of the front wheel ahead of you. Hold the staggered line for a minute, then drift back into single file when the road narrows, crowds, or you enter a corner where the front rider needs your full view. The order of movement matters: puller first, then the group rotates, and nobody changes position while the line is accelerating or braking hard.
Two mistakes wreck an echelon. Riding directly behind the front wheel wastes the air you stepped out of the wind to reach, and moving up two places at once leaves the rider you passed with nowhere to go. In a group with beginners, stay in single file on anything twisty, and only echelon on open, straight, low-risk terrain.
7. Leave the Paceline Safely
To peel off, ease out of the draft on the open side of the road, look over your shoulder to check for traffic and for riders behind you, then signal clearly and move fully off the line before you accelerate. Do not cut across the front of the group and do not dive back in front of the puller, because that is a genuine crash risk at speed.
If you are going to rejoin, come back on your own terms: pick a spot clear of the line, match the group’s speed before you merge, and merge at the back of the paceline or into the space behind the last rider. If you are continuing alone, pull fully out and make it obvious, because a rider who looks like they are joining and then sprints away is a hazard to everyone behind them.
Common Mistakes and How to Fix Them
Almost every paceline problem traces back to a rider doing something abruptly. Here are the errors I see most often in group rides, and the specific correction for each.
Overlapping or half-wheeling
A half wheel is sitting half a bike ahead of your station, tucked beside the rear wheel of the rider ahead rather than safely behind it. It feels efficient and it looks smooth to the rider, but it breaks the spacing rhythm and is a standard entry point to a chain-reaction crash. Hold your full gap until the group changes speed, then move as one unit.
Surging back onto the wheel
Coming off the front and then sprinting back onto the caboose is the most common reason beginners get dropped. A surge creates a gap the group cannot absorb, and the group is then doing two speeds. Ease back instead, match speed on the way in, and let the wheel come to you.
Riding with no escape room
Riding locked directly on the wheel buys a little extra draft and costs you all of your options if something happens in front. Most experienced riders deliberately sit slightly off the wheel for a small escape lane. Keep a hand on the bars, a finger ready on the brake, and enough room to steer around a problem rather than into it.
Sudden, uncoordinated braking
A hard stop at the front of a fast line is the classic domino effect. Signal the slow with an upturned palm and a voice call first, then brake in stages, front brake gently before the rear, and never grab both bars in a panic. If the line collapses behind you, get off the line, not into it.
Going silent at the wrong moment
Failing to call a hazard, a car, or a change in pace puts the decision on someone who has not seen it. Say short things early: hazard on the near side, slowing, car back, coming through. Volume and clarity beat vocabulary.
Blowing up on the first pull
Most riders go too hard at the front because the effort feels like the whole job. Treat the pull as one part of a rotation and keep something in reserve, especially on your first few turns, and especially on the two climbs you did not see coming. A rider who can still talk after a pull has managed it correctly.
Five drills that build the habit fast
Skills here are mostly rhythm, and rhythm responds to repetition more than to theory. Work through these on a quiet road, with a partner when possible, and they carry straight into the club ride.
- Single file, 10 minutes at pace. Ride a straight road at group pace without drafting, holding one hand on the hip and one hand on the bar. If you cannot do this smoothly, the line is not the problem yet.
- Two-up for 3 x 5 minutes. Sit on a wheel for five minutes, pull for five, rotate, and repeat. This is the whole sport in miniature and the fastest way to learn rotation timing.
- Wheel-tracking and gap drills. Hold a hand-width of clearance behind the wheel, then deliberately open to a full bike length and close it again without a surge. Repeat on a slight climb.
- Call-outs. Ride a lap calling every hazard, turn and change in pace out loud with a partner. If they can predict your moves, your communication is working.
- Echelon practice. On an open road, spend 60 seconds staggered, then return to single file on a cue from your partner. Practice the transition as carefully as the position.
Frequently Asked Questions
How much space should I leave between bikes in a paceline?
One to two bike lengths on a clean, dry road. That gap is close enough to keep most of the aerodynamic benefit of drafting, and far enough that you can steer around a problem instead of into it. Rough surfaces, wet roads, descents and night riding call for more, not less.
Can beginners ride in a paceline?
Yes, and joining a beginner-friendly or no-drop club ride is the best way to learn. Sit at the back, tell the ride leader it is your first time, and hold your station for the first few miles. The skills are rhythm and communication, not fitness, so they come back within a couple of rides.
How do cyclists rotate to the front?
Riders move up one place at a time when the line is steady, easing onto the wheel rather than attacking it, and take a pull at the group speed. They then move outward off the front, stay alongside briefly, and drift back down the line to the last wheel. Your turn is not finished until you are back on that wheel.
What is an echelon formation in group riding?
An echelon is a staggered formation in which each rider sits slightly behind and beside the wheel ahead, so the wind is shared rather than hidden behind one rider. Clubs use it in strong crosswinds, on wide open roads and in rain to avoid spray. It is often simply called riding staggered.
How do I join a paceline without causing a surge?
Ride up behind the last rider, match the group speed before you close any gap, and settle onto the wheel over several seconds rather than sprinting onto it. Enter from behind, never from the side, and never join mid-line. If the group is moving fast or the surface is poor, ask the ride leader to slot you in rather than guessing.
What should I do if I fall or become separated from the group?
If you fall, get off the racing line first and stay down long enough to check yourself before picking the bike up. If you get separated, do not chase the group in a panic; ride steadily, rejoin at the back of the line, and let the ride leader know you are back in. A calm rejoin is normal, not a confession.
Conclusion
Four things matter more than anything else when you ride a paceline for the first time. Start at the back and read the group before you move up. Communicate early, out loud, before you change position or change speed. Hold a predictable line and a full bike length of gap, even when the aero pull is tempting you closer. Then practise with an experienced group until the rotation feels ordinary rather than frightening.
That is the whole job. The riders who look effortless in a paceline are not riding better technique than you, they are just making fewer surprises.