Cold weather cycling clothing works as a system, not a single heavy jacket. The answer is a moisture-wicking base layer, a breathable insulating mid-layer, and a windproof outer shell, chosen to match the temperature, your effort level, and how long you plan to be out. Get that right and 2026‘s dark, wet rides become ordinary ones. Get it wrong and you either sweat for the first ten minutes or lose feeling in your fingers before you’ve turned a corner.
Most riders learn this the hard way. A bulky jacket feels warm standing at the door, then cooks you on the first climb and leaves you soaked and shivering on the descent. This guide walks through what you need, how to assemble it, how to adjust it on the move, and when cold has become a genuine safety problem.
Table of Contents
- What You Need
- Step-by-Step: Building and Using Your Winter System
- Build a Breathable Base Layer
- How to Dress for Cold Weather Cycling by Layering
- Protect Your Legs Without Overheating
- Keep Your Hands Warm at the Controls
- Protect Your Head, Neck, and Face
- Match the Clothing to the Forecast and Ride
- Check Your System Before Leaving
- Stay Dry and Adjust Layers During the Ride
- Common Mistakes
- Frequently Asked Questions
- Is one warm cycling jacket enough for cold weather?
- Should I wear cotton socks or underwear while cycling?
- Why do my hands and feet feel cold before the rest of my body?
- How cold is too cold to keep cycling?
- Should I wear the same amount of clothing for every rider?
- How can I stop from getting sweaty while wearing enough layers?
- Conclusion
What You Need
You need seven things, and most of them are things you can mix with the kit you already own. Think of it as a system you can add to rather than a shopping list to complete from scratch.
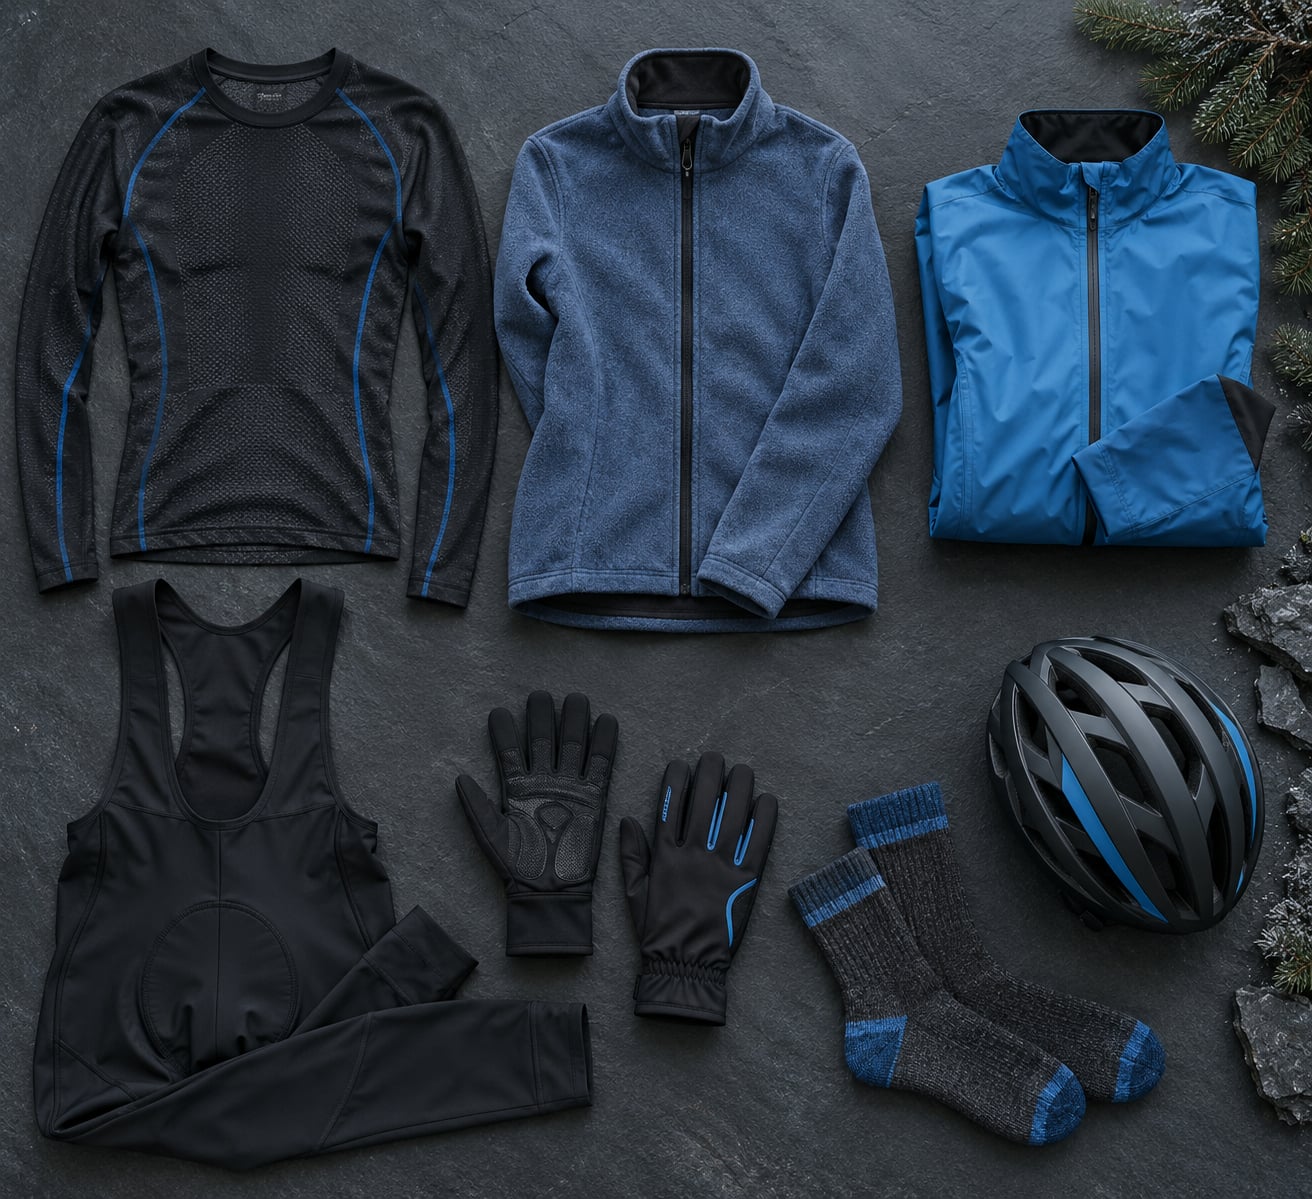
- Moisture-wicking base layer. A close-fitting top that moves sweat off your skin. Merino wool or a synthetic blend, never cotton.
- Insulating mid-layer. A thermal jersey, a grid fleece, or a light packable vest that traps warm air without blocking sweat.
- Windproof or water-resistant outer shell. The layer that stops convective heat loss. A fully waterproof membrane is for sustained rain; a windproof shell is what most winter days actually need.
- Leg coverage. Thermal bib tights, or your normal bib shorts plus leg warmers, plus thermal socks and overshoes for the coldest hours.
- Wind-resistant gloves or glove liners. Full-fingered, close-fitting, and thin enough that you can still feel a brake lever.
- Head and neck coverage. A fitted helmet cover, a thin balaclava, or a neck gaiter. You do not need all three.
- Optional eye and accessory cover. Clear cycling glasses for wind and debris, a warm drink flask, and reflective detailing for low-light hours.
One honest note from cold-weather commuters: nobody needs a dedicated winter jersey for every band. Swapping the thickness of the two inner layers while keeping the same windproof shell is the whole trick, and it is exactly the flexibility the system is supposed to give you.
Step-by-Step: Building and Using Your Winter System
Build a Breathable Base Layer
The base layer’s only job is to move sweat off your skin and let it evaporate. A synthetic top wicks fastest and dries quickest, which is what you want for hard efforts and long rides. Merino wool feels better on the skin, resists odour for days, and works when the ride stretches out, but it dries slower and costs more.
Fit matters more than brand. It should sit close, have flat seams so nothing rubs on your shoulders under a pack, and have a slightly longer drop at the back so it does not ride up when you bend forward. The classic mistake is cotton: it absorbs sweat, holds it against your skin, and keeps you cold long after you stop. If you own one cotton layer, retire it to the garden.
How to Dress for Cold Weather Cycling by Layering
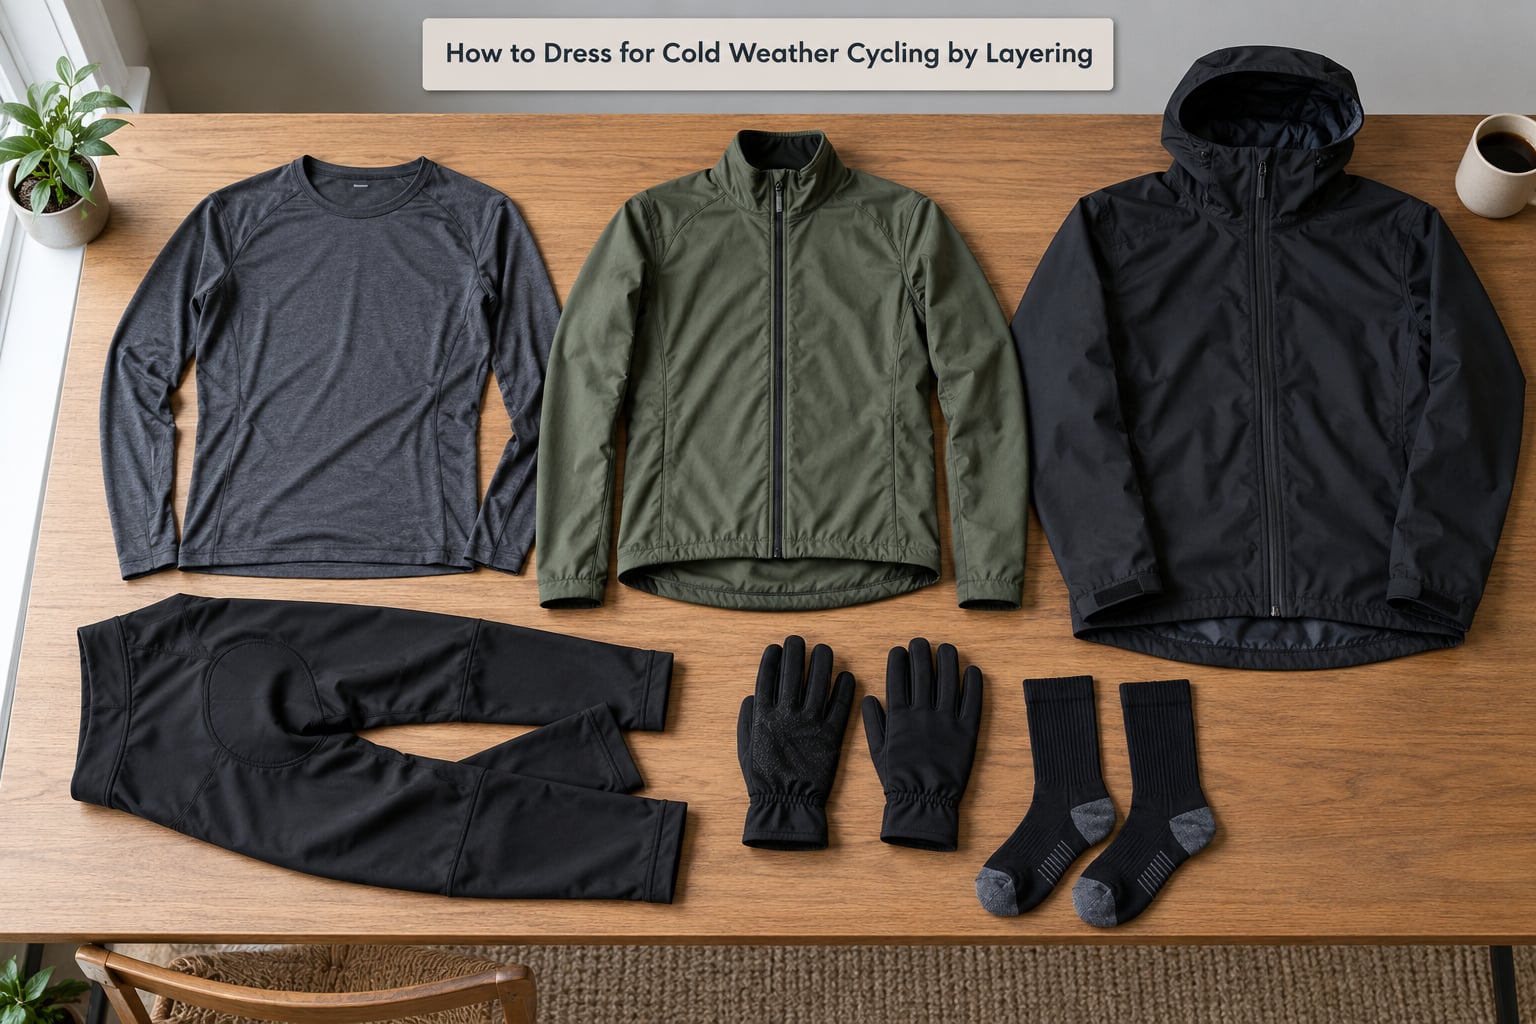
Three layers, each doing one job, is the whole method. The base layer wicks, the mid-layer insulates, and the outer layer blocks wind and rain. Every layer should be light enough to move in and compress under the one above it.
Cycling makes this work in your favour in a way it does not for a walker. Pedalling generates roughly three to five times more body heat than sitting still, and moving air strips that heat away in proportion to your speed. Layers let you hold onto the heat your legs are making while still letting sweat escape, which is why you can unzip at the top of a hill and ride on.
The golden rule: start slightly cold and warm up within five to ten minutes. If you are sweating before the first junction, you have one layer too many.
Protect Your Legs Without Overheating
Legs generate a lot of heat on the bike, which is why most riders underestimate leg warmth and discover it on the first stop. Four options cover almost everything.
- Thermal bib tights — the warmest single-leg option, best below about 5°C (41°F). Choose them fitted at the knee, since bulk there bunches when you pedal.
- Thermal tights over your normal bib shorts — the same warmth, but the waistband and chamois read better and cost less.
- Full-length tights plus leg warmers — two thin layers you can strip down on a climb. The warmth is comparable; the adjustability is not.
- Knee or ankle warmers — the flexible option for riders who run hot, and the easiest answer to “I need more warmth but only sometimes.”
Check ankle clearance before every ride. Cold air down the shoe is the fastest route to cold feet, and deliberately closing that gap is part of the kit for most winter riders.
Keep Your Hands Warm at the Controls
Cold hands are a safety problem, not a comfort complaint. When your fingers lose fine control, braking pressure becomes guesswork and you start hunting for shifters with cold thumbs. The system that works most often is glove liners plus wind-resistant outer gloves: the liners handle warmth, the outer gloves handle wind and moisture, and the whole stack still fits inside a bar bag on a mild day.
Fully insulated winter gloves are worth it below freezing, but only if they still let you wrap your fingers around a brake lever. Anything too bulky makes you grip less and shift clumsily, which is worse than slightly cold hands. Check the cuff length so no wind reaches your wrists, and run the hands under warm water at a cafe stop rather than riding with them numb for an hour.
Protect Your Head, Neck, and Face
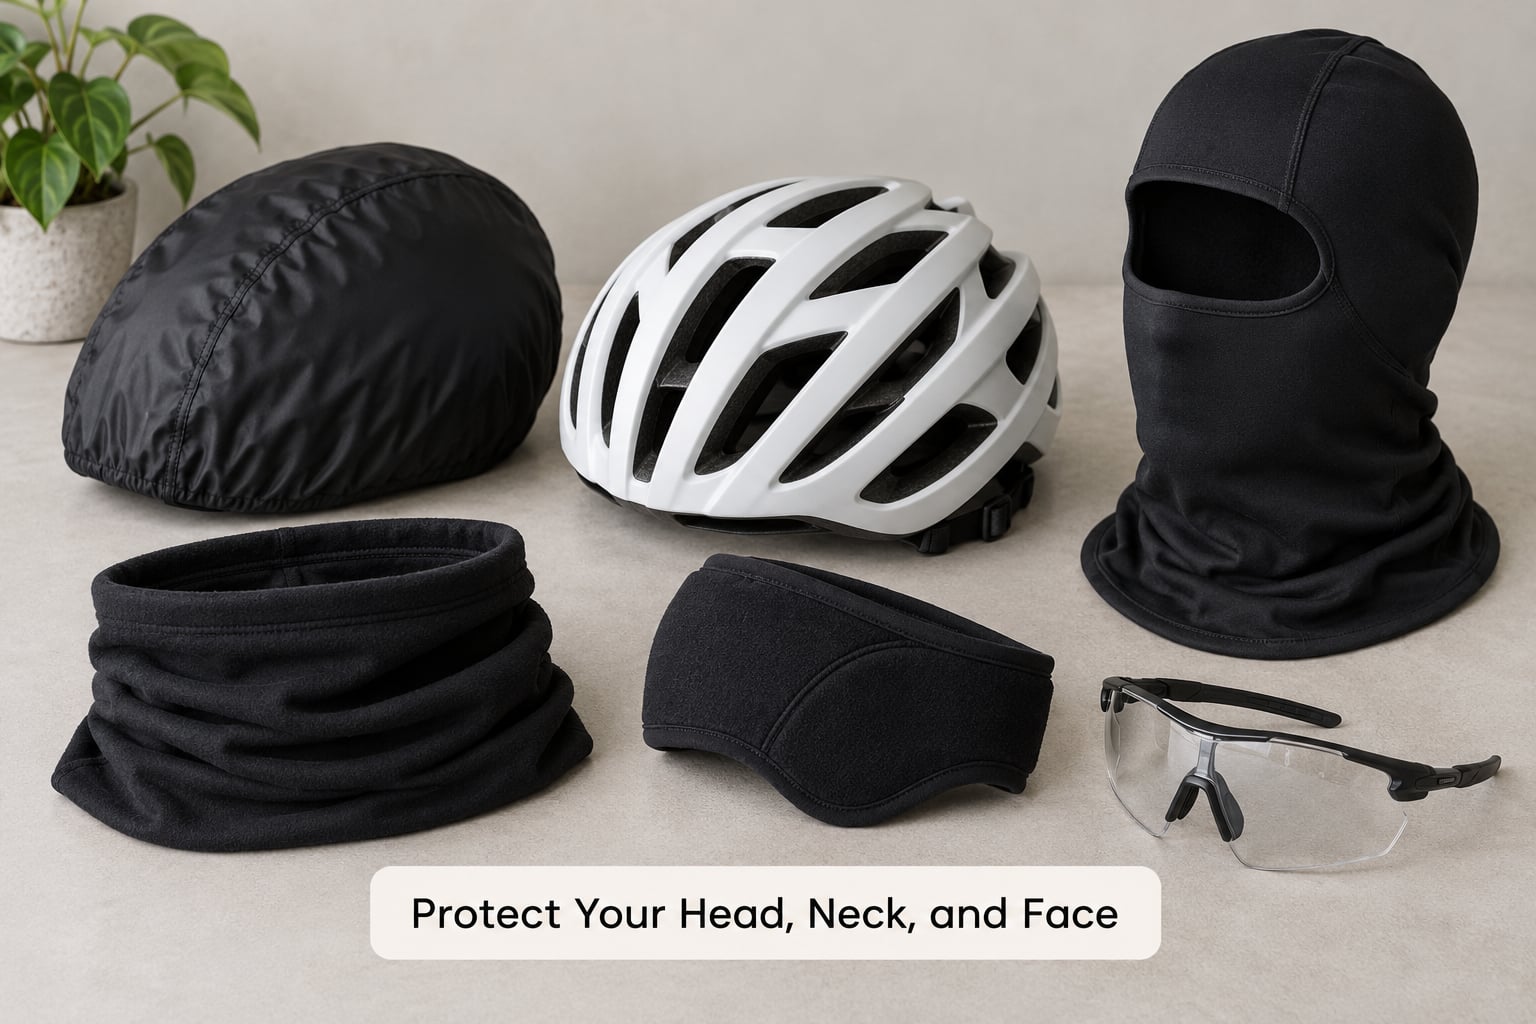
These are separate options, not a checklist you have to complete. A fitted helmet cover under your helmet keeps wind out of the vents for almost any situation and costs nothing to carry. A thin balaclava covers the ears, nose, and forehead. A neck gaiter handles the neck and lower face on a windy descent. An ear warmer is a lighter version for mild cold. Clear glasses stop wind, road spray, and insects getting in your eyes.
Contrary to the old head-heat-loss claim, your head is not a special heat vent; it just tends to be the only uncovered skin on the rider. What actually matters is that nothing is left exposed, that your helmet still fits level after you add a layer, and that whatever you choose does not fog your glasses, block your hearing, or restrict your peripheral vision.
Match the Clothing to the Forecast and Ride
There is no universal temperature-to-kit chart because clothing is personal. Metabolism, body size, base layer thickness, wind exposure, and whether you spend the ride seated or standing all shift the answer. Treat the forecast as the starting point and your own last ride in similar conditions as the better reference.
Four variables matter most. Air temperature sets the baseline. Wind adds a chilling effect that grows with speed, so a 5°C day with a strong headwind on an open road can feel worse than 2°C in a sheltered valley. Rain, and especially cold rain, drains heat far faster than dry cold does. Duration matters too: on a two-hour ride you can add a layer at a stop, on a forty-minute commute you mostly have to get the start right.
A practical way to choose: work down the list of what you feel first. If your hands go first, upgrade gloves and glove liners. If your core goes first on descents, upgrade the outer shell. If you sweat within ten minutes everywhere, you are wearing too much insulation in the mid-layer, not too much in the base layer.
Check Your System Before Leaving
Spend five minutes on a pre-ride check and you will not need a change of clothes at the first junction. Do a short climb or a set of stairs to test the system under effort.
- Reach both arms forward, twist at the waist, and get on and off the bike. Nothing should pull, bunch, or restrict.
- Confirm the gloves let you squeeze a brake lever and click a shifter one-handed without looking.
- Check the hem and collar for wind entry when you are in a riding position, not standing up.
- Run every zipper and vent so you know which ones work in gloves.
- Walk for two minutes and check that nothing has dampened at the back or under the arms.
- Confirm the headwear does not fog your glasses or shift your helmet off level.
Stay Dry and Adjust Layers During the Ride
Management on the move matters more than perfect dressing at the door. Open zippers and vents before you start sweating, not after. Breathe through your mouth on steep climbs to dump heat without stripping a layer in traffic. If the mid-layer is dampening, take it off and stow it in a jersey pocket before it soaks through.
For descents and long tobogganing stretches, carry a thin packable shell or vest that stows to the size of a fist. Water-resistant outer layers buy you time in a shower, not a dry ride in a downpour, and it is worth being clear-eyed about that: after twenty minutes of heavy rain, a membrane slows the wetting rather than stopping it.
Wet gloves and socks deserve special mention because they recover badly. Change them at a stop rather than riding with them, and take the extra pair with you. Riders who commute through 2026‘s coldest months treat spare liners and a spare pair of wool socks as essential equipment rather than a luxury.
Common Mistakes
Wearing cotton. It absorbs sweat, stays wet, and strips heat from you at every stop. Replace base layers and socks with wool or synthetics.
Buying one bulky winter jacket and calling it a system. One thick layer traps some heat but cannot be vented or removed without exposing you. Wear a shell over a mid-layer you can unzip or pull off.
Overdressing at the start. Being warm standing at the door guarantees a soaked back by the first hill. Start slightly cold and warm up inside ten minutes.
Underdressing because the wind feels brutal at rest. Wind chill at a standstill is not the same as wind chill at 30 km/h, and once you are moving you generate far more heat than you did standing there. Dress for the ride, not for the doorstep.
Wearing clothing that restricts movement. A stiff jacket, bulky gloves, or tights that bunch at the knee get abandoned mid-ride, usually at the coldest point. Test range of motion before you leave.
Leaving skin exposed. A gap at the neck, wrist, or ankle is a highway for cold air, and a bare forehead or neck changes how the whole system feels.
Neglecting socks and shoe clearance. Cold feet ruin a ride faster than a cold torso. Merino or synthetic thermal socks plus overshoes, and check that a thick sock does not squeeze your foot in a narrow cycling shoe. Wool socks are the cheapest useful upgrade most riders make.
Riding on through serious symptoms. Persistent numbness, confusion, stumbling, slurred speech, clumsiness, or a sudden lack of shivering are warning signs that your body is losing the fight against the cold. Stop, get out of the wind, get warm, and get help. For severe symptoms — confusion, extreme drowsiness, loss of coordination — call emergency services rather than trying to ride home. Cold injuries need professional assessment, so follow medical advice rather than any cycling forum.
Frequently Asked Questions
Is one warm cycling jacket enough for cold weather?
A single jacket works only in a narrow band, roughly 5°C to 15°C with low wind, and only if it has vents you can open. Below that you need an insulating mid-layer under a windproof shell, because a thick jacket you cannot vent traps sweat and leaves you colder after the first climb. Above that band a jacket is usually overkill. Riders who commute long distances keep one shell for years and swap the layers underneath instead.
Should I wear cotton socks or underwear while cycling?
No, and this is the mistake that ruins the most winter rides. Cotton absorbs sweat, holds it against your skin, and dries so slowly that you are still damp an hour later. Use merino wool or synthetic thermal socks, and synthetic or wool underwear instead of cotton. Alpaca wool socks add extra warmth on the coldest rides, though they cost more than merino.
Why do my hands and feet feel cold before the rest of my body?
Your hands and feet have no muscles to generate heat and carry blood vessels far from your core, so they cool first. Cycling also leaves the hands exposed on the levers and the feet inside a vented shoe. Treat that as a signal rather than a nuisance: cold fingers reduce braking and shifting control, and cold feet usually mean sock thickness, overshoes, or ankle coverage that needs fixing. Add glove liners and a warmer outer glove before you add a jacket.
How cold is too cold to keep cycling?
There is no single number, because wind, wet, duration, clothing and rider fitness all shift the line. Use this as a guide: below -10°C (14°F) with wind, or below 0°C (32°F) in rain or snow, a casual winter kit is not enough and the ride becomes a survival exercise. Turn back or shorten the ride if you cannot keep your hands functional, if you stop sweating on climbs, or if you feel clumsy or confused. Those are cold stress signs, not toughness.
Should I wear the same amount of clothing for every rider?
No. Metabolism, body size, base layer thickness, wind exposure and riding position all change how cold a ride feels. A rider comfortable in shorts and a short-sleeve jersey at 25°C often finds 15°C chilly, while a bigger rider in the same kit stays comfortable. The system is the same for everyone, but the thickness of each layer is personal. Track what worked on comparable rides with the same effort, rather than copying someone else’s kit list.
How can I stop from getting sweaty while wearing enough layers?
You usually have the mid-layer too thick, not too many layers. Wicking base layers handle moisture, so a heavy fleece on top of them traps heat you cannot shed. Thin the insulation, keep the shell ventable, and unzip before you feel damp rather than after. If you are soaked in the first ten minutes, start one step lighter and add the layer to your bag instead. Lightweight merino or grid fleece vests give most of the warmth for far less air than a thick mid-layer.
Conclusion
The three-layer system is the whole answer: a wicking base layer, an insulating mid-layer, a windproof shell, plus gloves, leg coverage, thermal socks and headwear you can adjust. Here is what to do first. Check the forecast for air temperature, wind and rain, then assemble the system rather than one heavy jacket. Test it on a short ride near home, adjust the mid-layer thickness based on how you felt, and only then commit to a long winter event.