To adjust handlebar height on a road bike, you move the spare headset spacers from above the stem to below it, which raises the bars by exactly that spacer thickness. To lower them, you reverse the move. Once the steerer has no spacers left, your choices are flipping the stem for positive rise, fitting a positive-rise stem, or bolting on a stem riser.
The whole job takes 20 to 40 minutes with a couple of hex keys, and measuring carefully before you touch a bolt saves you doing it twice. Most complete road bikes ship with a 20mm or 30mm spacer sitting above the stem that has never been used, so check there before you assume you are out of options.
Table of Contents
- What You Need
- Step-by-Step: How to Adjust Handlebar Height on a Road Bike
- Loosen the Stem and Reorder Spacers to Adjust Handlebar Height
- Use a Stem Angle Change for a Larger Adjustment
- Tighten the Cockpit to the Correct Torque
- Check the Result Before Riding
- Common Mistakes
- Frequently Asked Questions
- Should I change handlebar height or reach first?
- How high should handlebars be on a road bike?
- Can I add spacers to raise my handlebars?
- Do I need to retape the handlebars when I change the stem?
- How much handlebar height can I safely add?
- When should I have a bike shop adjust the handlebars?
- Conclusion
What You Need
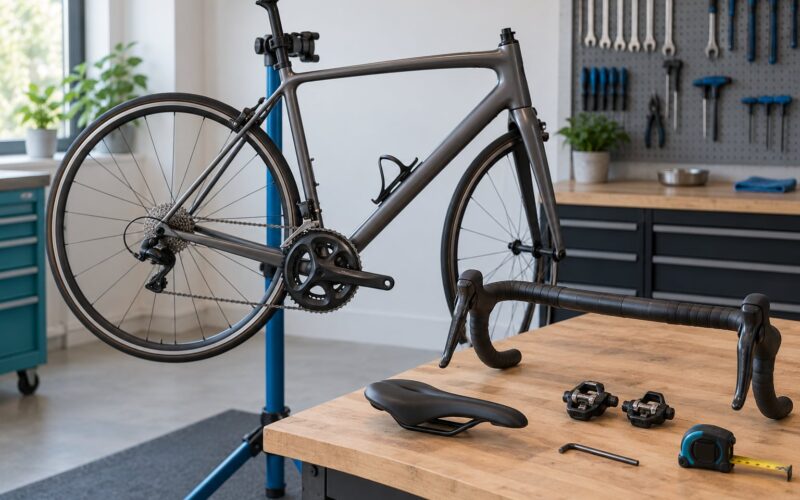
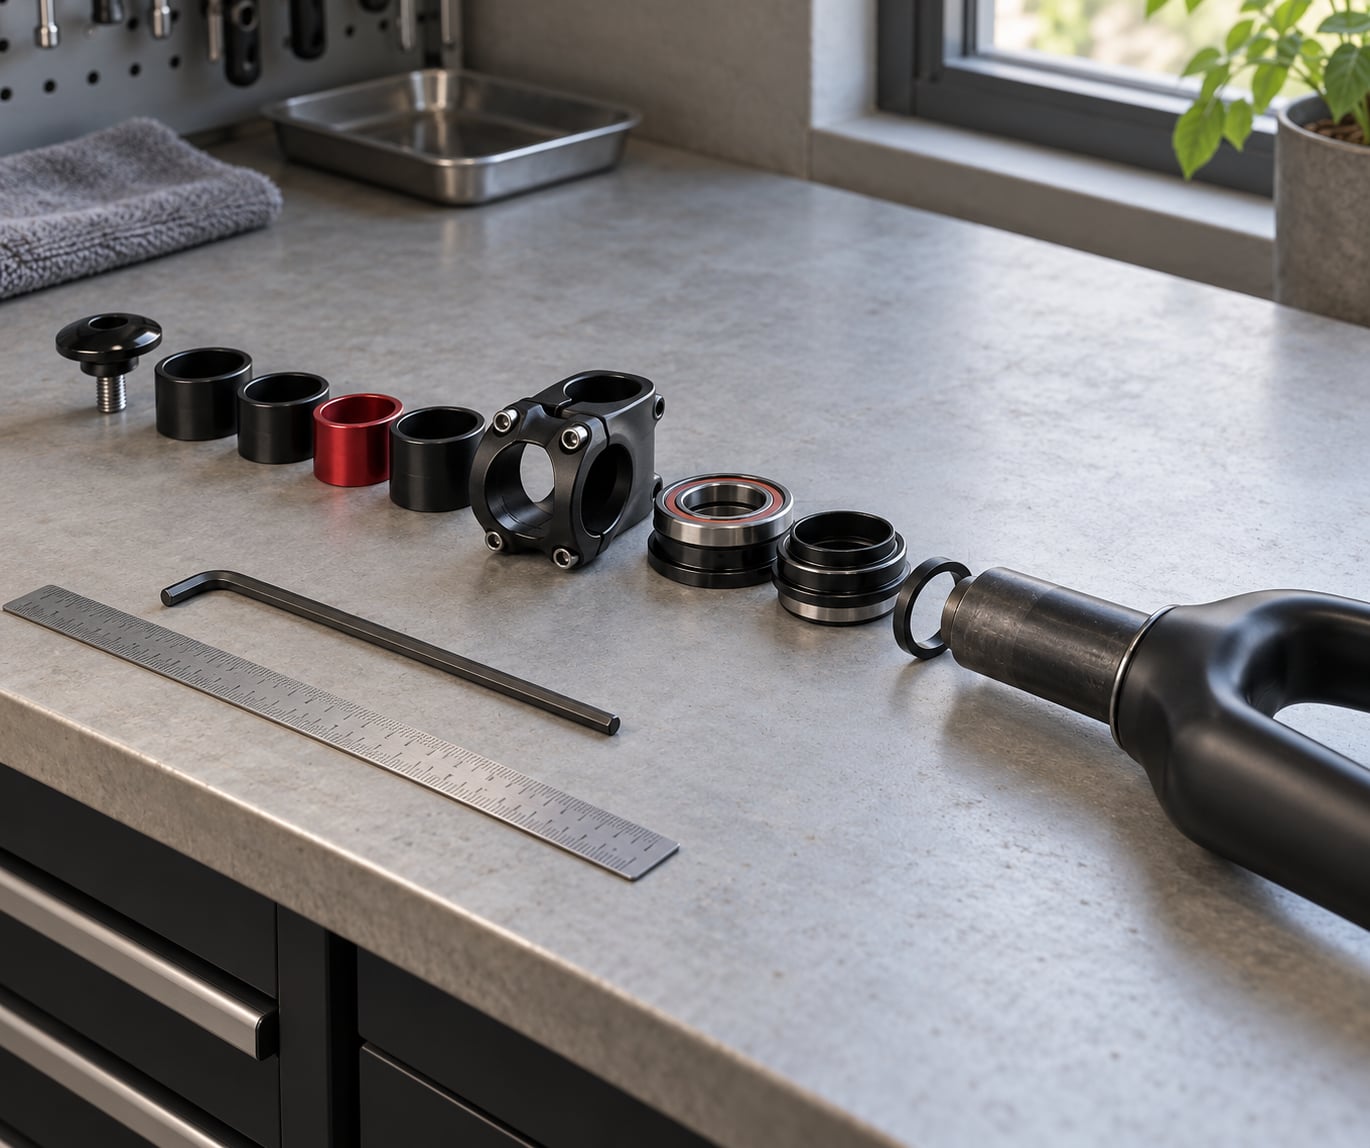
You need very little, and most of it you probably already own:
- Hex keys in 4mm, 5mm and 6mm — 4mm and 5mm cover most modern stem bolts, older quill stems often take 6mm. Buy the ball-end kind; a straight key in a recessed bolt head is a frustrating afternoon.
- A torque driver — a click-type torque wrench with interchangeable bits. This is the one tool worth buying if you do not own one, because over-tightening the top cap is the most common way people damage a headset.
- A tape measure or steel rule — for recording saddle height and bar height before you start.
- Headset grease and a clean rag — a thin film on the steerer thread and under the top cap stops the cap and stem from galling over time.
- The manufacturer’s torque figures — check the stem, steerer and top cap before loosening anything. Many components are stamped or printed with their own spec, and that number beats a generic one.
Before anything else, work out which kind of steerer you have. Look at the top of the headset: if the stem has a clamp ring with bolts around it and a cap with a single bolt in the centre, you have a threadless steerer, which is what almost every road bike made since the early 2000s uses. If instead there is a single large slotted nut holding the stem in place, and the stem has a long quill sticking up through it, you have a threaded steerer with a quill stem, which is a completely different procedure.
It is also worth separating unsafe from uncomfortable. If the bars are so low that your weight is on the hoods, or so high that the steering feels vague in corners, you have a problem. If the bars are simply lower than you would like them, that is a comfort and position question, and you can work through it at home.
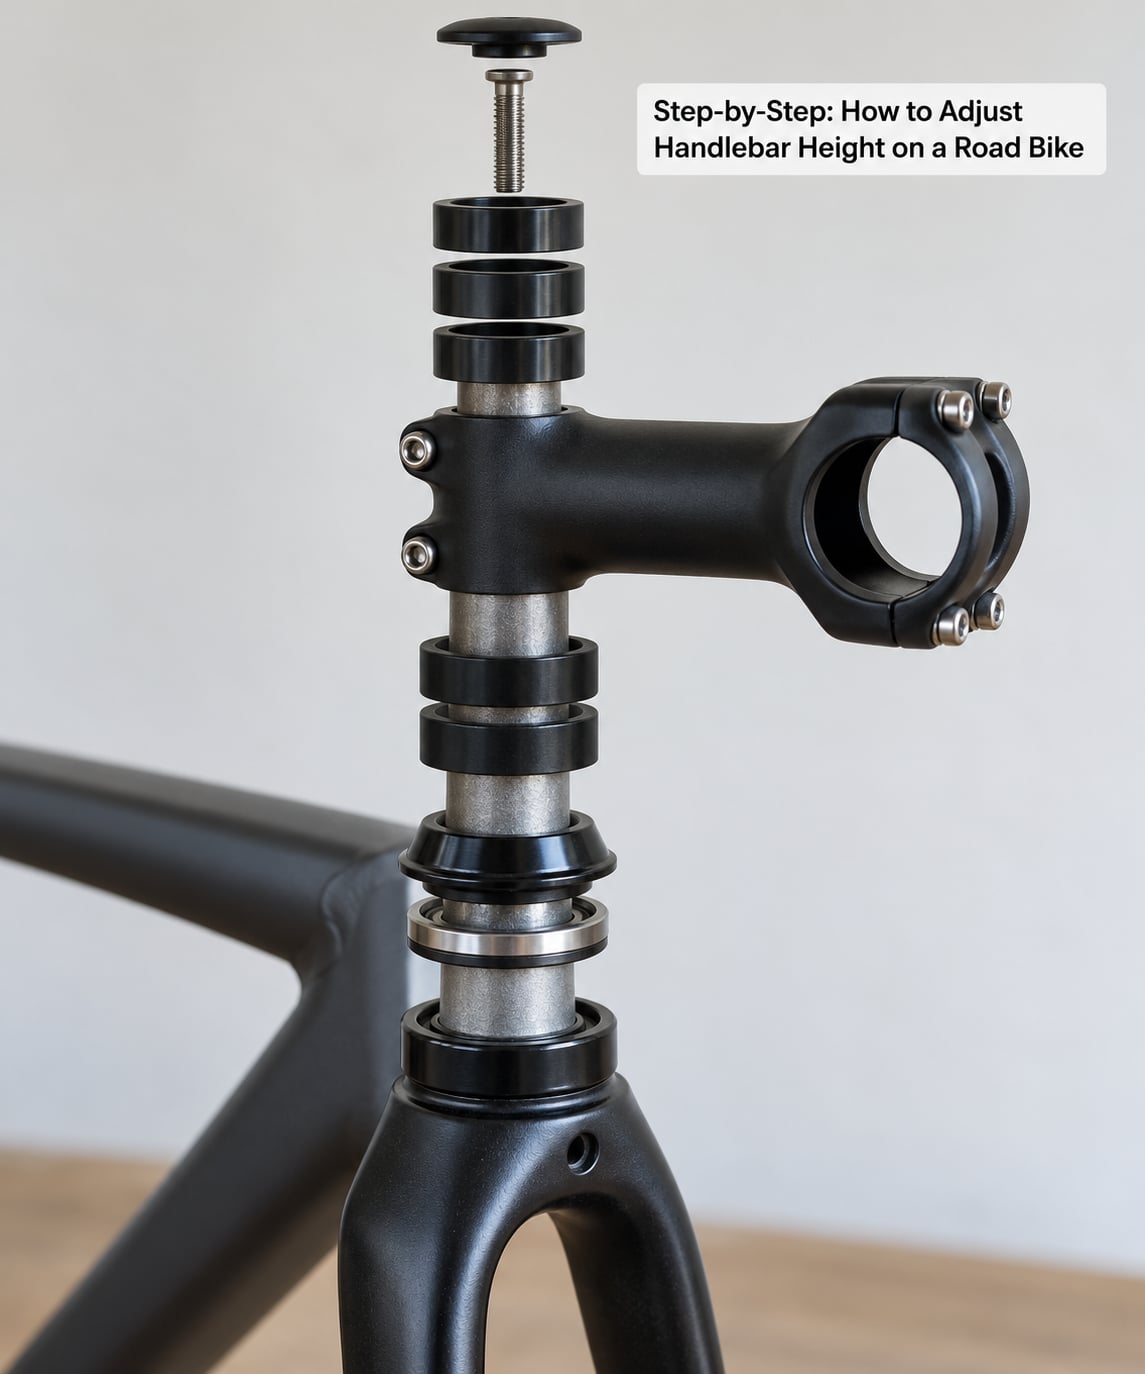
Step-by-Step: How to Adjust Handlebar Height on a Road Bike
Start with a cold bike on a stand if you have one. A wet, warm frame and a hot brake rotor will both make this harder than it needs to be.
Loosen the Stem and Reorder Spacers to Adjust Handlebar Height
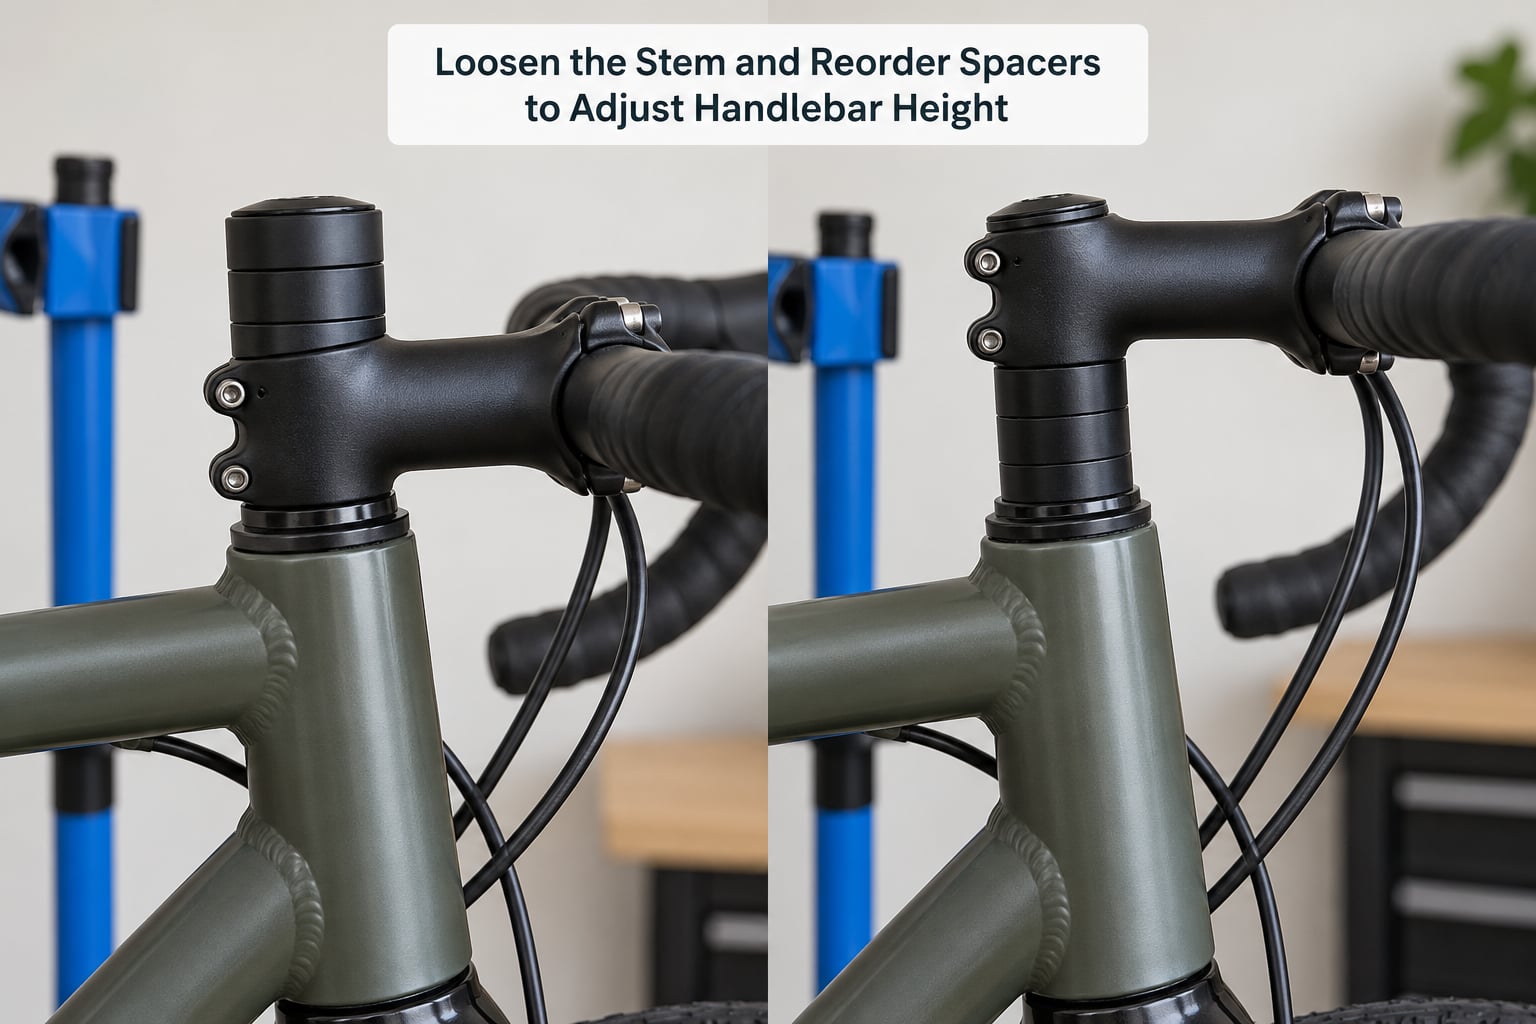
Hold the front wheel between your knees or support the frame, then back out the top cap bolt a few turns. Follow it with the four bolts around the stem clamp ring, working diagonally so the ring comes off evenly, and the stem itself lifts straight off the steerer tube.
Now you can see exactly how the pieces are stacked. Most complete bikes arrive with a 20mm or 30mm spacer above the stem plus a thin 3mm or 5mm one underneath it. To raise the bars, take every spacer off and rebuild the stack the other way around, putting the largest spacer below the stem. To lower them, move spacers from below the stem to above it.
Keep the stack tidy and put the spacers back in their original order and orientation, and take a photo before you start so you can rebuild it exactly as it was if the new position does not suit you. Do not loosen brake or gear cables to make this easier; a small height change should never require touching the cables at all.
Use a Stem Angle Change for a Larger Adjustment
Spacers give you a few millimetres at a time, and a 30mm move is a lot to gain from thirty millimetres of hardware. When you need more, change the stem angle instead.
Flipping an existing stem upside down swaps a negative-rise stem, which points down and forward, for a positive-rise stem, which points up and forward. You gain rise and lose some forward reach at the same time. The bolts that clamp the stem to the steerer sit in a slightly different position, so make sure they land squarely in their slots before you tighten anything.
A dedicated positive-rise stem gives more rise again, usually in 6 to 17mm, and is the tidier option if the flip angle is awkward. Either way, a stem swap is more involved than a spacer move: the levers and shifters come off the bar and go back on, the bars usually get re-taped, and internal cable routing has to be re-threaded through the frame. Check your bar clamp diameter before buying a stem or riser, because road bars are commonly 31.8mm, 25.4mm on older or entry-level bikes, and occasionally 35mm, and the two halves of the clamp must match.
Tighten the Cockpit to the Correct Torque
The order matters more than the numbers. The top cap sets the headset preload, and the stem clamp bolts hold the stem against the steerer. Tighten the stem first and the top cap can never do its job, which is where the play and clicking in a loose headset usually comes from.
- Top cap first, lightly. Roughly 1 to 2Nm, which on most click-type drivers is barely a click or two. It should feel snug and rotate the headset smoothly with a light hand, with no significant vertical play.
- Stem clamp bolts second. Around 5Nm, tightened in a diagonal cross pattern. Hold the stem so it cannot rotate while you work.
- Stem-to-steerer bolts third. Faceplate bolts on a two-piece stem, or the single pinch bolt on a one-piece stem, typically 5 to 6Nm.
If your stem or top cap is stamped with its own figure, that figure wins. Check that the steerer still shows enough thread above the top cap and that at least the minimum insertion marked on the steerer tube is still clamped inside the frame and fork. If the steerer shows a mark, stay above it.
Check the Result Before Riding
Stand over the bike and look down at the bars from above. They should be level, centred on the steerer, and free of any twist you did not intend. Squeeze both brake levers hard and confirm each one pulls the lever to the bar and locks the wheel. Work every shift lever through its full range, then check the cable housing at the lever and at both ends of the run for tension, rubbing or a sharp bend.
Then ride it. Ten minutes of easy spinning close to home will tell you more than any measurement, because what you are really testing is your hand pressure, wrist angle and lower back. Most fitters treat this as a loop: make one small change, ride, assess, repeat.
Common Mistakes
Tightening the top cap last, or too hard. The top cap is a preload adjuster, not a clamp. Tighten it before the stem bolts and stop at light resistance; a stripped preload bolt or a seized headset is the expensive version of this mistake.
Losing the washer under the top cap, or fitting it upside down. It is a small part and it is easy to lose on a workshop floor. Put the stem back on first, then drop the cap and bolt down the steerer so the washer cannot escape.
Stacking spacers in the wrong order. The largest spacer usually belongs closest to the headset below the stem, and the smallest shim sits right under the clamp ring. Physical order does not change the height, but rebuilding it exactly as it was means you can undo the change cleanly.
Using spacers you have not accounted for. The 5mm or 10mm pieces under the stem plus the 3mm on top are all height you can move. Count the total stack height before you decide you are out of options.
Overtightening the faceplate. Carbon stems and bars are easy to crush. Tighten in stages and check that the faceplate sits flush with no gap before the driver clicks.
Exceeding minimum steerer insertion. Too little steerer clamped inside the frame is a genuine safety limit, and the marks printed on the steerer tube are there for a reason.
Changing height without reconsidering reach. Raising the bars shortens your effective reach and shifts your weight back. If your hands start sitting behind the shifters, or you feel like you are stretching for the tops, you have changed reach, not just height, and a different stem length will fix what extra spacers broke.
Two habits make this much less risky. Work to a written measurement rather than by eye, and do one change at a time so you know which change fixed what.
Frequently Asked Questions
Should I change handlebar height or reach first?
Height first, almost always. Moving spacers above and below the stem is quick, reversible and free, and it tells you how much of your discomfort was a height problem rather than a reach problem. Once the height feels right, if you still stretch for the tops or your hands sit behind the shifters, that is a stem length or bar reach problem, and only then is it worth spending money.
How high should handlebars be on a road bike?
There is no universal right number, because bar height is a relationship rather than an absolute. Most riders settle somewhere between a small drop and level with the saddle nose for an upright endurance position, with race setups dropping well below that. Measure saddle-to-bar drop instead of guessing, then ride and judge it by hand pressure, wrist angle and how your lower back feels after an hour.
Can I add spacers to raise my handlebars?
Yes, as long as you still have spare steerer tube to clamp. Move existing spacers from above the stem to below it first, because most complete road bikes arrive with 20 to 30mm above the stem that has never been used. Adding spacers you did not have works too, but keep the total stack within the steerer’s marked insertion limit and tighten in the correct order so the headset has no play.
Do I need to retape the handlebars when I change the stem?
Only if you take the levers off the bar, and you will need to if you swap the stem or change its angle. Levers are usually easiest to refit with the tape off. If you are simply moving spacers above and below the stem, the bar never leaves the stem and the tape stays untouched, which is one good reason to try spacers before anything more invasive.
How much handlebar height can I safely add?
The safe amount is whatever spare steerer you have left, and no more. Count the existing spacer stack, then check the minimum insertion mark printed on the steerer tube before you start. Beyond your spacers, a positive-rise stem or a stem riser gives the extra height, and check the bar clamp diameter first, because road bars come in 25.4mm and 31.8mm and sometimes 35mm.
When should I have a bike shop adjust the handlebars?
See a mechanic if the steerer is cut short, if your frame or bars are integrated so the bar and stem cannot be separated, if the headset itself has play or a stiff spot, or if you need to replace cables and bar tape. A simple spacer move on a conventional bike is well within home ability. Anything involving a stem swap, carbon components or internal cable routing is worth paying a shop to do.
Conclusion
Make one small, measured change: photograph the stack, move a single spacer from above the stem to below it, tighten the top cap before the stem bolts, then ride for ten minutes. Keep the steerer’s insertion mark in view at all times and check both brakes and all levers before you head out. If the steerer runs out of room, the frame is integrated, or you are unsure about the cable routing, book a qualified mechanic rather than guessing — a cockpit job is cheap compared with a cracked steerer or a lever that does not pull.