A roadside repair kit is the small bag of tools and spares you carry so a mechanical problem does not end your ride. Riders who work out roughly one puncture every 6,000 miles and one serious tyre event every 20 years, as forum regulars on Cycling UK report, tend to pack for two things: fixing whatever makes the bike unrideable, and getting home afterwards. That is a shorter list than most articles suggest.
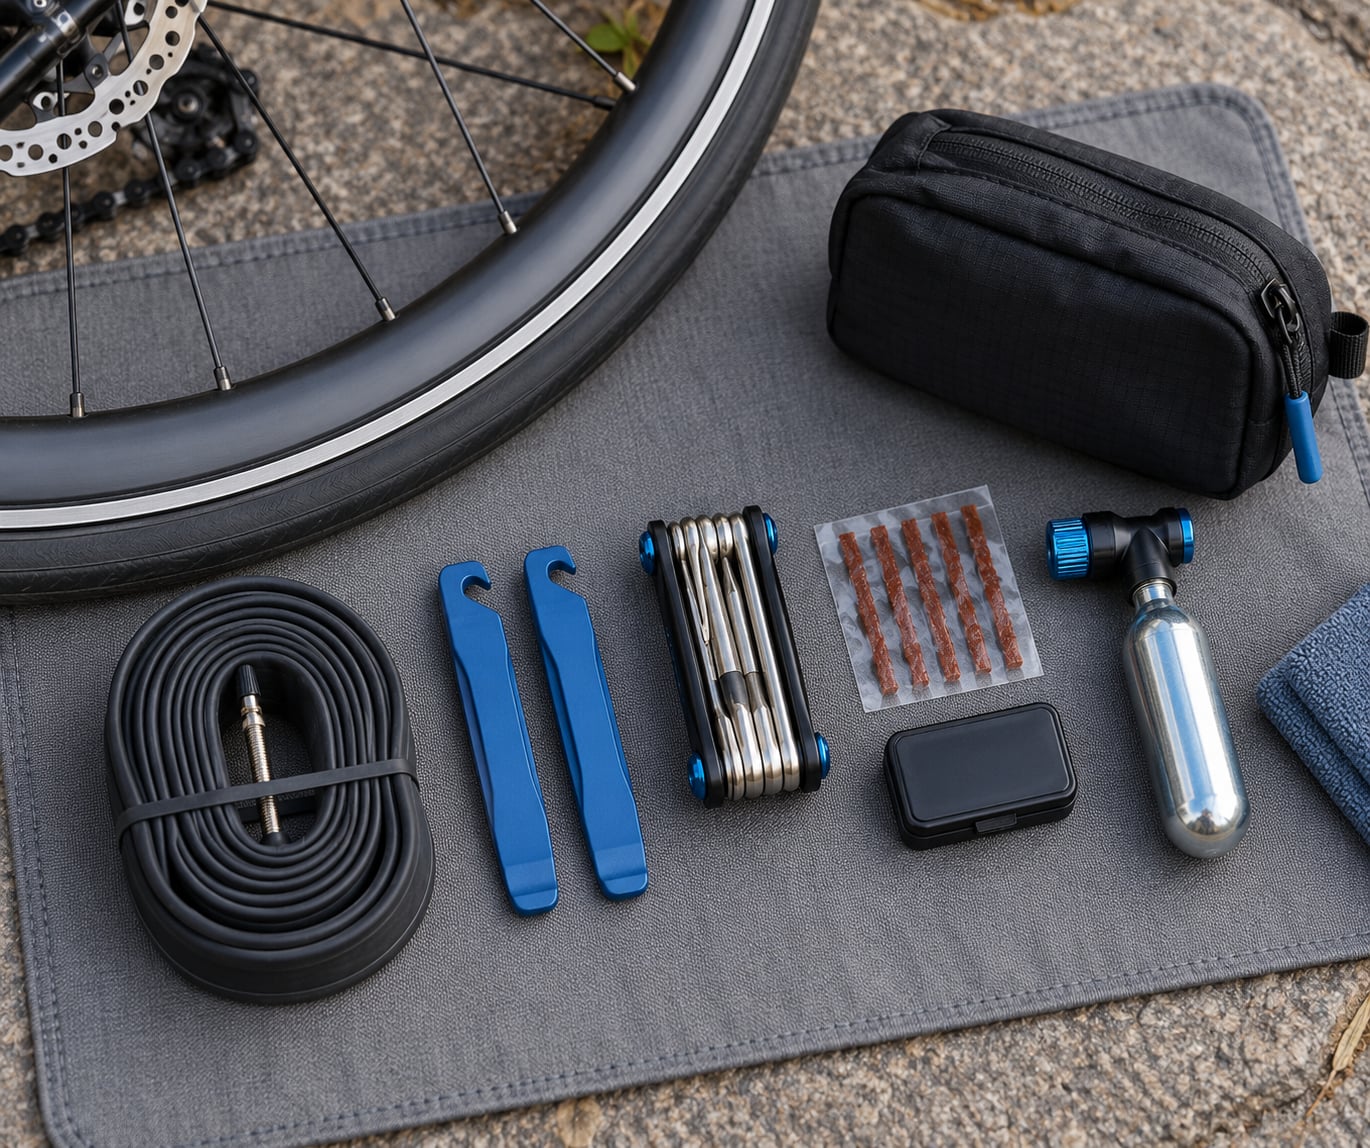
These are the roadside repair kit essentials for road cyclists, in the order they earn their space. A lot of kit advice is written for cars, where a spare wheel weighs 20kg and the failures are roadside-obvious. On a bike the weight budget is a few hundred grams and the failures are far more specific, so the list looks different.
Table of Contents
- Roadside Repair Kit Essentials at a Glance
- 1. Spare Inner Tubes
- 2. Tyre Levers
- 3. Compact Tyre Plug Kit
- 4. Mini Floor Pump or CO2 Inflator
- 5. CO2 Cartridge With Inflator Head
- 6. Multi-Tool With Chain Breaker
- 7. Chain Quick Links
- 8. Spare Brake Pads
- 9. Spare Derailleur Hanger
- 10. Patch Kit or Adhesive and Vulcanising Fluid
- 11. Valve Core Tool and Spare Valves
- 12. Compact Carry Bag or Pouch
- Frequently Asked Questions
- What are the most important items for a roadside repair kit?
- Do I need a mini pump if I carry CO2 cartridges?
- What should I carry when riding tubeless?
- How do I choose a chain quick link that fits my bicycle?
- How do I practise roadside repairs before I need them?
- Conclusion: Build the Kit Before the Emergency
Roadside Repair Kit Essentials at a Glance
| Essential | Primary roadside use | Why it belongs in the kit |
|---|---|---|
| Spare inner tubes | Replacing a punctured tube | Fixes the single most common failure, so it is the kit’s foundation |
| Tyre levers | Getting the tyre bead off and back onto the rim | You cannot refit a tyre without them, and they weigh almost nothing |
| Compact tyre plug kit | Temporary repair of a tread hole | Stops small leaks fast so a spare tube stays in the bag |
| Mini floor pump | Refilling a tyre to ride pressure | Predictable pressure control for anything beyond one flat |
| CO2 cartridge and inflator head | Rapid inflation after a repair | Fast and tiny, but limited volume, so it works best as a top-up |
| Multi-tool with chain breaker | Bar and bolt adjustments, chain repair | Covers the fittings that loosen or drop mid-ride |
| Chain quick links | Rejoining a broken chain | Turns a ride-ending break into a two-minute job |
| Spare brake pads | Replacing worn pads mid-ride | Made a wet descent unrideable when pads are worn through |
| Spare derailleur hanger | Replacing a bent hanger after a crash | Model-specific, so cheap insurance if you know your bike |
| Patch kit | Permanent repair of a holed tube | Saves the tube you just fitted and repairs cuts a plug will not hold |
| Valve core tool and spare valves | Fixing a slow leak or a broken valve | Under 10g and solves the leak that gets mistaken for a puncture |
| Compact carry pouch | Keeping the kit ordered and reachable | Loose kit in a jersey pocket is kit you will not find when you need it |
1. Spare Inner Tubes
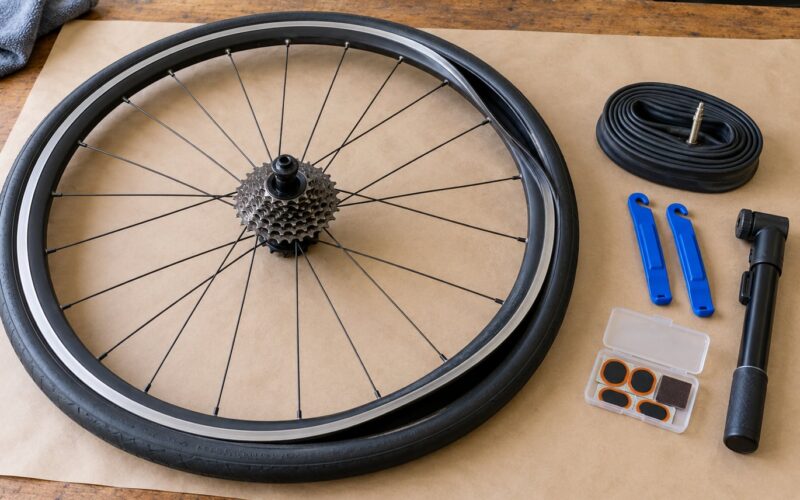
Carry the tube size printed on the sidewall, and check it before every ride rather than once a season. A 700x25c road tyre does not take a 700x35c tube, and discovering that in a gravel car park ruins the afternoon.
How many you need depends on how far you are from help. One tube handles one flat, and a second is cheap insurance for a ride on roads littered with flint or glass. Riders on Cycling UK describe riding home on a tube that had already been repaired once, which is a decent argument for a third.
TPU tubes weigh less than butyl and hold pressure longer, so they suit riders who carry tubes as standard rather than for emergencies. Butyl is cheaper and more forgiving to patch. Either works; mismatched sizing does not.
2. Tyre Levers
A matched pair of levers is the minimum you need to get a tyre off a rim and, crucially, to get it back on. Most roadside failures come with a second problem attached, and losing the bead while refitting is the classic one.
Plastic levers snap when they are cold, a complaint that comes up often on road.cc comment threads. If you ride through winter, a pair with a metal core is worth the extra grams. Skip metal levers on removable rims, where they can cut rim tape and the rim itself.
One more lever is not a bad idea either. With two, losing one halfway through a roadside change means improvising with a multitool or a stick.
3. Compact Tyre Plug Kit
A plug is a short rubber or fibre cord pushed through the hole from the inside, sealing it as it passes. For a thorn or glass in the tread it works in under a minute, and it lets you finish the ride on the tube you already have.
Find the object first. A plug seals the hole, but the glass stays in the tyre and will find the tube again inside a few miles. Take the tyre off, run a finger carefully around the inside, then plug and refit.
Plugs do not fix cuts. Anything wider than a couple of millimetres in the sidewall or carcass needs a boot or a spare tube instead, and a plug kit is no substitute for carrying one tube.
4. Mini Floor Pump or CO2 Inflator
A pump wins on control and a cartridge wins on speed. A mini floor pump of the sort that mounts under a bottle cage gets a road tyre back to pressure in roughly 30 to 40 strokes and lets you set pressure by feel, which matters most in cold weather when pressure drops overnight.
The head has to match your valve. Presta valves, standard on road bikes, will not connect to a Schrader fitting without a small adapter, and adapters are exactly the part people leave at home. A Presta to Schrader adapter weighs a few grams and lets you use a petrol station pump when your own is broken.
Pressure matters as much as volume. Under-inflated tyres feel slow on the road and unpredictable in a wet descent, and a tyre at half pressure heats up and picks up punctures far more readily.
5. CO2 Cartridge With Inflator Head
A cartridge inflates a road tyre in about 15 seconds, which is why racers and high-mileage riders often carry two. The control valve, not the cartridge, decides whether you can set pressure or only guess at it, so buy the inflator with a proper thumb lever rather than the cheapest threaded version.
Practise a full cartridge at home before a day ride. Threading the valve, opening the lever and stopping at the right pressure all takes a few attempts, and learning it in the cold on a dark road is how riders end up overinflating a tyre and pinching the tube.
One warning worth knowing: standard butyl is porous to carbon dioxide, so a tube filled with CO2 on Sunday can be soft by Wednesday. Riders regularly misread that as a new puncture. Treat cartridges as a fast top-up, not as a permanent pressure solution.
6. Multi-Tool With Chain Breaker
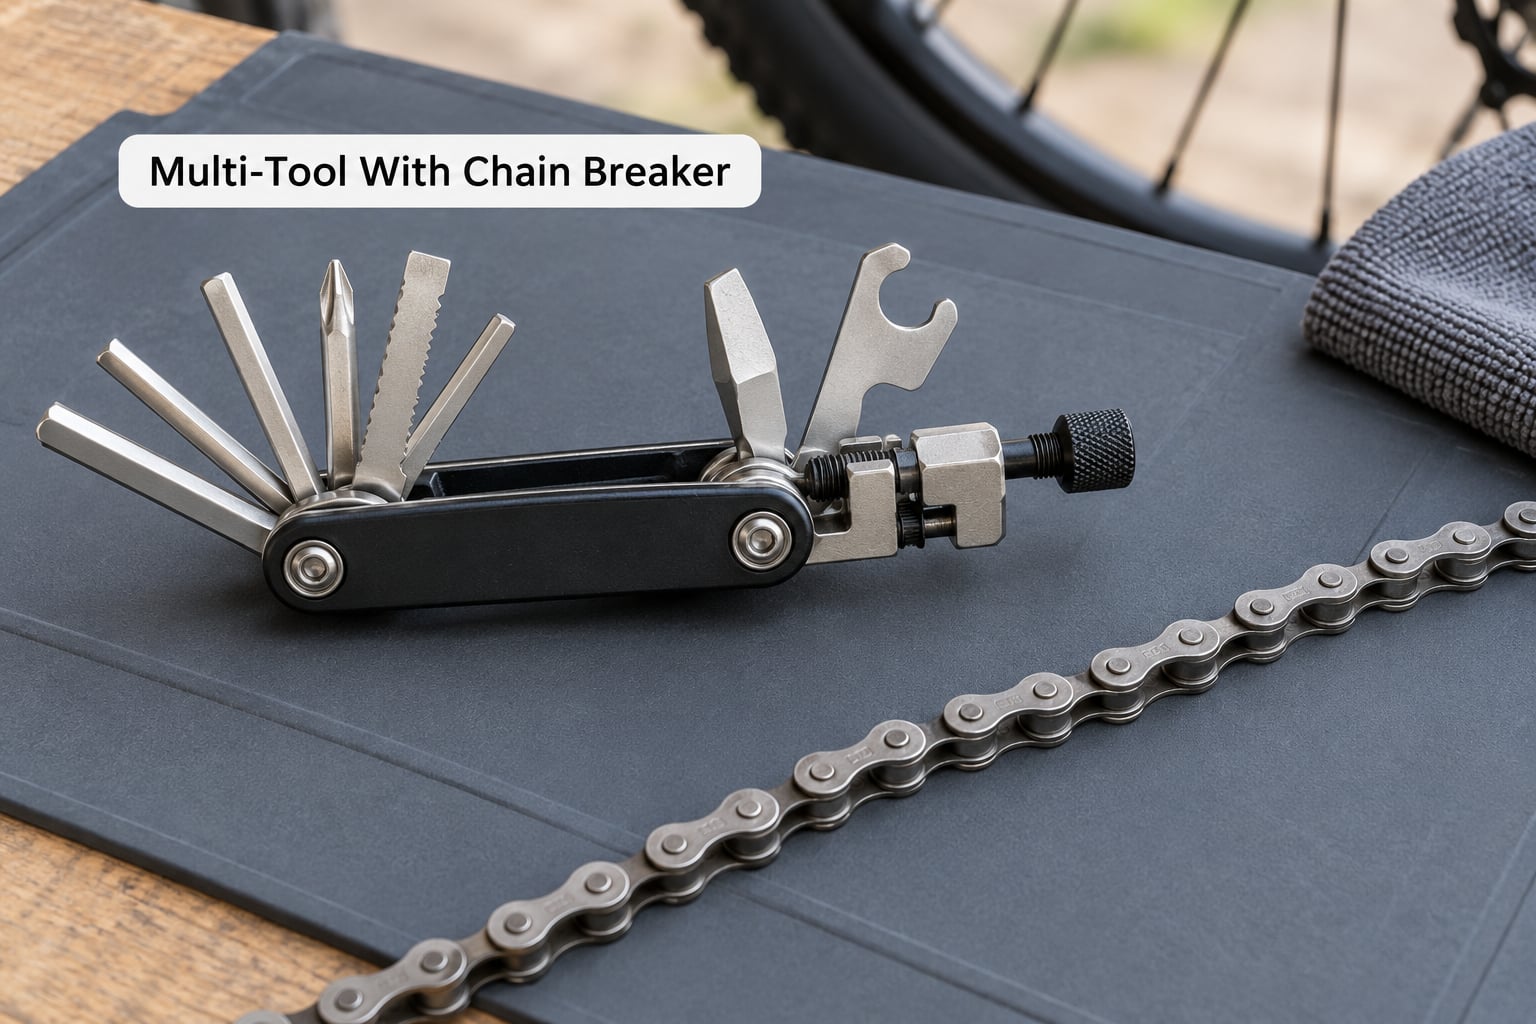
A multi-tool handles the small adjustments that end rides quietly: a slipped brake caliper, a loose stem bolt, a bar-end that has rotated, a chain drop on a shift under load. Check that the bits match your bike before you rely on it, since Torx T25 and hex 5mm cover different generations of components and the wrong set leaves you one tool short.
The tool that matters most is the chain breaker. It drives out a pressed-in chain pin so you can fit a quick link, and a chain tool without a working pin is just an expensive bundle of hex keys. Folding tools with chrome vanadium bodies survive being dropped in a jersey pocket; cheap all-plastic ones do not.
Ask two questions before buying. Are the implements easy to reach one-handed, and does the chain breaker line up with the chain when the tool is folded flat? A tool you cannot open in gloves is not a roadside tool.
7. Chain Quick Links
A quick link is a small connector that closes a broken chain in seconds, and for most riders it beats rebuilding the chain with a chain tool and a fiddly pin. Carry one compatible link and the repair is over before the group has finished asking what happened.
Matching is straightforward once you know what to check. The link must suit your chain width, so 11-speed and 12-speed chains need different links, and it must carry the right speed rating rather than being a cheaper lower-rated part pressed into a high-stress position.
Confirm that your drivetrain maker allows a quick link in that position, since some use connecting-pin style links instead. Pack the spare links in a small zip bag; a loose link rattling around a jersey pocket is a link that will be lost before it is needed.
8. Spare Brake Pads
Worn pads turn a wet descent into a decision you should not be making. Once the friction material is gone, the lever pulls to the bar or the pads stop clearing the rim or rotor, and stopping distance on a damp mountain descent stops being theoretical.
Compatibility is the whole difficulty. Pad compounds and backing plates differ between rim brake and disc brake, between road and gravel, and between manufacturers of the same named type. Check the caliper or brake maker’s fitment chart, and note whether your bike takes a cartridge or a pad set.
A set of pads is small and light enough to carry year-round on the rides where you actually brake hardest. If you ride flat terrain only, leave them for the season of descents rather than dropping them permanently.
9. Spare Derailleur Hanger
The derailleur hanger is the small replaceable block that the rear mech hangs from. Bend it in a crash and the mech twists into the spokes; ride on without replacing it and you can damage the mech and the wheel, not just the part that was already bent.
This is the most model-specific item in any kit. A hanger fits one frame or one derailleur family, and the generic-looking ones on sale are usually close enough to destroy the threads in the frame if forced. Identify yours from the frame make and model and confirm with the manufacturer before ordering.
If you do not want to carry a bike-specific spare, a few cable ties, a 5mm hex key and a short length of gear cable are the fallback riders use. That offcut can be threaded through the mech and clamped as an emergency tensioner, and a tie around the derailleur cage limits the damage a bent mech does to the spokes.
10. Patch Kit or Adhesive and Vulcanising Fluid
A patch kit gives you a semi-permanent repair of a holed tube instead of throwing the tube away. Scrape the area rough, apply vulcanising fluid, wait until it is tacky rather than wet, press the patch on hard, and dust off the excess. Ten minutes and the tube goes back in the bag for the next flat.
This matters most in tubeless setups, where a plug holds a small tread hole but a cut still needs bridging, and in places where the same object keeps finding the same section of tyre.
Patches and plugs solve different problems, so carry both if you can. A plug seals a hole from inside in seconds and can get you rolling immediately; a patch is the repair you make once you are somewhere safe. Self-adhesive patches are no substitute for glue, since they bridge a hole without sealing it properly under pressure.
11. Valve Core Tool and Spare Valves
A tyre that goes soft overnight usually has a slow leak through the valve, not through the tube. Removing the valve core and fitting a fresh one fixes most cases, and the tool is a single hex key that fits in the pocket of a multi-tool.
Carry two spare cores and one spare valve if you ride tubes. A damaged Presta or Schrader valve can come from a heavy tube pump clamp, a knock on a kerb, or a wheel that has been off the bike more often than it should have been.
Riders who rarely get punctures can skip this, but the people who do need it are usually the ones stranded by it, because a slow leak does not announce itself until the tyre is flat. A handful of cores costs nothing and weighs nothing.
12. Compact Carry Bag or Pouch
A seat bag or small handlebar pouch is what turns a collection of items into a kit. Everything loose in a jersey pocket is kit you will be digging for with cold, greasy hands, and the item you need is always the one that migrated to the bottom.
Size it to the riding, not to the shopping list. A pouch that holds a spare tube, levers, a small multi-tool, a cartridge and a patch kit is enough for a commute. Long rides and gravel need room for a second tube, plugs, sealant and a pump, which usually means moving to a top tube bag or a half-frame bag.
Balance repair capacity against weight and bulk honestly. Riders on forum threads regularly describe carrying 20 or more items and regretting it, and the classic giveaway is a patch kit or bandages still unused after years in the bottom of the bag. If you never plan to ride far from a road, leave the touring load at home.
Frequently Asked Questions
What are the most important items for a roadside repair kit?
A useful minimum is spare tubes or tubeless plugs, tyre levers, an inflation option, a multi-tool with a chain breaker, and compatible quick links. Add the small parts that match how you ride: brake pads for long descents, a spare hanger if you crash often, valve cores for a slow leak. You do not need to fix everything, only what makes the bike unrideable, well enough to ride home.
Do I need a mini pump if I carry CO2 cartridges?
CO2 inflates a tyre in seconds and a cartridge is tiny, but the total air in one 25g cartridge is limited and much of it escapes a butyl tube quickly. A pump gives better pressure control and is what you want when two flats or a slow leak are plausible. Riders who rely on cartridges alone talk about being stranded by a third puncture, so carry both if the weight is acceptable.
What should I carry when riding tubeless?
Tubeless changes the balance rather than removing the need for a kit. Carry plugs, an insertion tool, sealant, tyre levers, one or two compatible tubes as backup, and a way to inflate. Sealant plugs small tread holes by itself, but a sidewall cut, a large hole, or a broken tyre bead will still open the tyre, and then a tube and a boot are what get you home.
How do I choose a chain quick link that fits my bicycle?
Match the link to your chain width and speed rating, then confirm that the drivetrain manufacturer permits that link type in the position you need it. A link from a different chain width may not close properly or may sit proud between the plates. Pre-assembled multi-links are easier to fit than loose plates and pins for riders doing a first roadside repair.
How do I practise roadside repairs before I need them?
Set a spare wheel beside your own at home and take the whole tyre off, find the cause of the puncture, fit a new tube, and inflate it, working by feel rather than by following a video. Then do it again wearing gloves, in the dark if you ride at night. Most riders who are stranded report not knowing how to remove a wheel, not missing an item.
Conclusion: Build the Kit Before the Emergency
Start with the four things that decide whether you ride or walk: a correctly sized tube, levers, a way to inflate, and a multi-tool with a chain breaker and a quick link to match. Everything else on this list is insurance for the riding you actually do.
Put the kit in a pouch, not a jersey pocket, and check the tube sizes and chain speed rating before you ride rather than during. Then fit a spare wheel at home and change a tyre by feel. That hour in the garage has saved more rides than any item on the list.