Bleeding a hydraulic disc brake means pushing fresh fluid up from the caliper to the lever so trapped air bubbles rise out and escape. That air is what makes a lever feel soft and vague, and getting rid of it restores a firm bite point and full stopping power. On a road bike the job takes 30 to 60 minutes per brake, and the hardest part is usually the model-specific fitting, not the physics.
What follows is the process I use on road bikes: work out the fluid type, get the caliper bleed nipple as high as it will go, flush from the caliper upward, then test at walking pace before you ride. If your brake is one of the integrated or electronic designs with no reservoir port, the answer changes, and I cover that further down.
Table of Contents
- What You Need
- Step-by-Step: How to Bleed Hydraulic Disc Brakes
- Check the Brake and Wheel First
- Prepare the Lever and Bleed Port
- Push Out Old Fluid and Air
- Purge Trapped Air From the Caliper
- Close the System and Reassemble
- Test the Brake Before Riding
- Common Mistakes
- Frequently Asked Questions
- Should I bleed my brakes with the reservoir cap on or off?
- Can you just gravity bleed hydraulic disc brakes?
- Why are my brakes still spongy after bleeding?
- Do I need to remove the brake pads to bleed hydraulic disc brakes?
- How often should you bleed hydraulic disc brakes?
- How do I activate an ABS pump to bleed bike disc brakes?
- Start With a Safe, Complete Bleed
What You Need
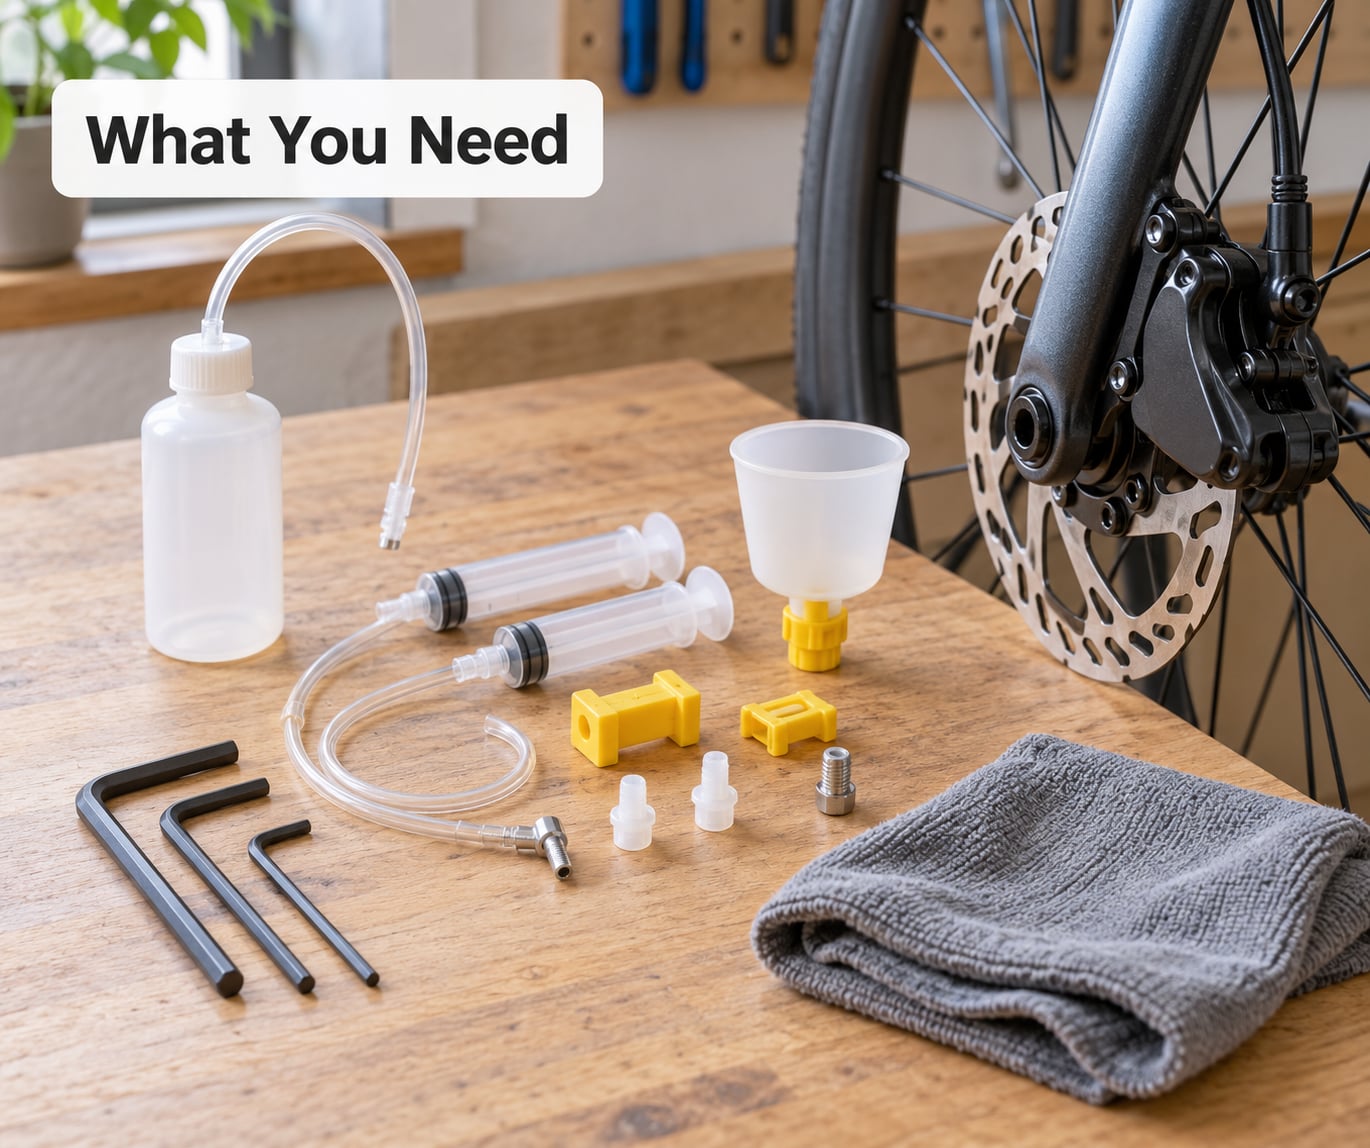
Start with the manual for your exact lever. Shimano, SRAM/Avid, Tektro and Campagnolo all use different fluids and different fittings, and a bleed kit bought for the wrong brand usually will not connect.
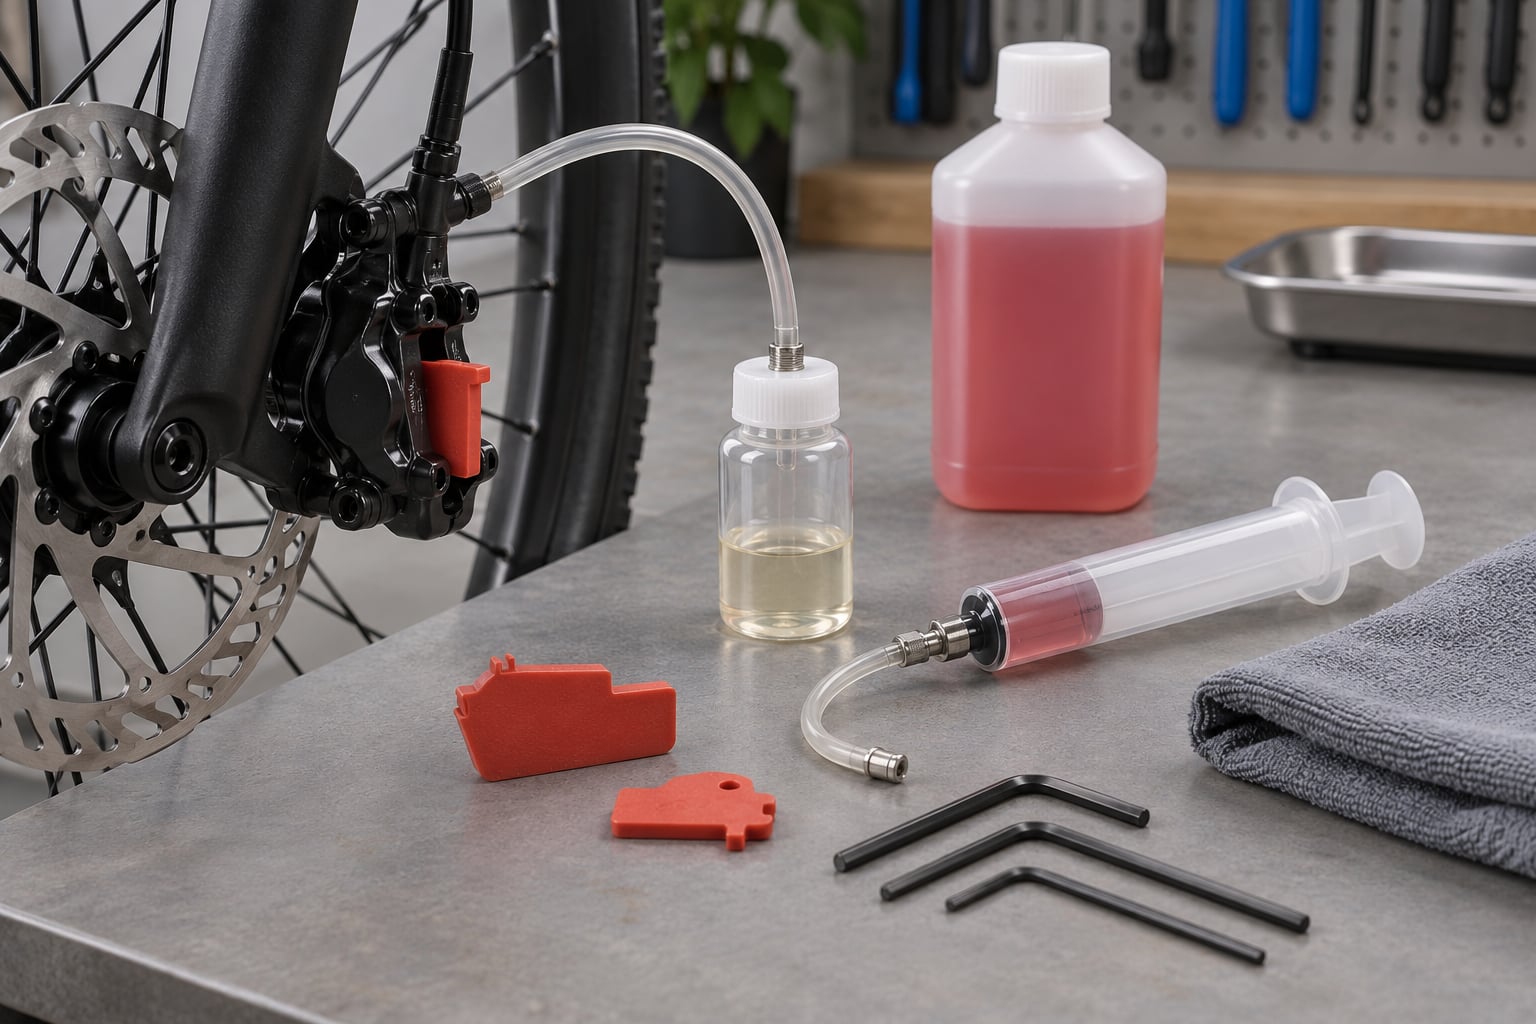
- Bleed kit or bleed funnel — a syringe kit with a drain hose and block for Shimano-style levers, or an Avid-style syringe plus oil funnel for SRAM brakes. Some Shimano kits come with the funnel already in the box.
- Hex keys and Torx tools — usually 2.5 mm, 3 mm and 4 mm hex, plus T6, T8 and T10 Torx. Pad retention pins on calipers are frequently Torx.
- Clean catch container — a small bottle or jar that sits under the caliper nipple. A plug that fits the top of the bottle keeps debris out.
- Fresh fluid of the correct type — mineral oil or DOT, matched to the brand and the fluid spec in your manual. Do not top up with a different type.
- Clean rags and isopropyl alcohol — for cleaning the bleed nipple and getting fluid off pads and rotors. Dedicated brake cleaner works better on rotors that have taken a splash of oil.
- Gloves and eye protection — brake fluid is not something you want on skin or in your eyes, and it does pit paint and rubber mounts fast.
A repair stand makes this much easier, mainly because it gets the caliper nipple high and the lever in reach at the same time. A bleed block or a pair of pad spacers is worth having too: it keeps the pistons centred so fresh fluid goes to the top of the caliper rather than flooding the pad bores.
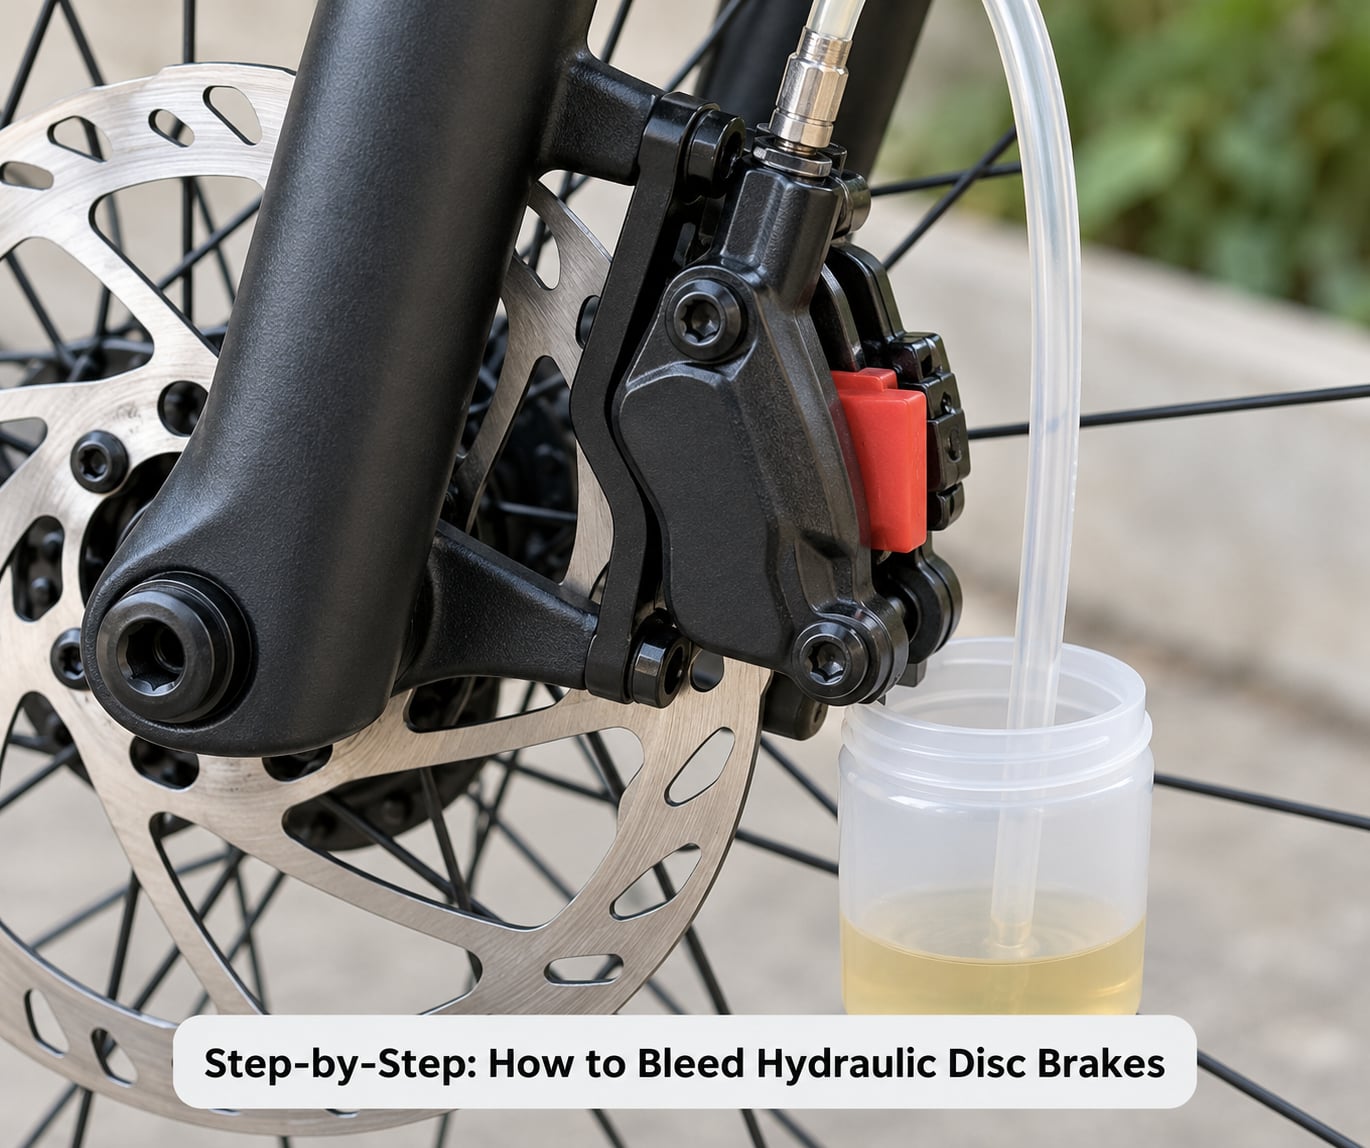
Step-by-Step: How to Bleed Hydraulic Disc Brakes
Check the Brake and Wheel First
Before you open anything, squeeze the lever and watch what happens. Firm almost straight away means the system is mostly fine and you may only need a top-up. A lever that travels a third of its stroke before biting has real air in it, and a lever that pulls all the way to the bar has either a fluid leak or a badly stuck piston.
Take the wheel out and look at the rotor, the pad faces and the caliper body. Run a finger along the rotor edge; a lip there is runout, not air, and no amount of bleeding will fix a warped rotor. Fluid on the pads or rotor means contamination and a full pad and rotor service after the bleed.
Now identify the fluid. Shimano and most Japanese road brakes run mineral oil. SRAM, Avid, Tektro and Campagnolo generally run DOT fluid, often DOT 5.1. Reservoir-style levers with a visible plastic chamber are almost always mineral oil. Check the lever body or caliper for a marking before you pour anything.
Prepare the Lever and Bleed Port
Fit the bike in the stand and rotate it so the caliper bleed nipple points straight up. Vertical routing matters: air rises, and a hose that dips into a low loop will hold air no matter how well you flush. If the hose routes along the down tube and under the bottom bracket, keep the brake lever level and be patient.
Remove the pads and the pad retention pin, then slide in the bleed block. If the block keeps sliding out, a strip of folded paper towel makes a decent makeshift spacer. Do not bleed with the pads fitted unless your manual specifically allows it, because fluid that touches a pad destroys it.
Clean around the bleed nipple with a rag and isopropyl alcohol before you crack it open. Grit in the nipple seat is the usual cause of a brake that starts weeping a week after a clean bleed.
At the lever, remove the reservoir cover and clean the inside of it. Set it on a clean cloth rather than dropping it in your toolbox. Now the direct answer to a question people search for constantly: bleed with the reservoir cap off. The cap traps air above the fluid, and that air has to be displaced somewhere. The exceptions are Shimano MTB and flat-bar levers whose manual says to leave the cover on so the rotor of the reservoir spins and stirs the fluid, and sealed electronic units where the cap is not removable at all.
Fit the syringe and set it so that when you push, fluid goes toward the caliper. On SRAM brakes the funnel sits in the top port with the plunger open to atmosphere, and you never pressurise from the lever side. On Shimano the syringe on the caliper gets the flow from the top down, and the funnel at the lever catches whatever comes back up.
Push Out Old Fluid and Air
Loosen the caliper bleed nipple a quarter turn. Open the syringe, fill it with fresh fluid from the correct bottle, then push fluid through the caliper until it runs out of the bleed port into your catch bottle without bubbles. A steady stream with no air in it is the signal that the lower half of the caliper is full.
Close the nipple finger-tight, then work the lever. On Shimano, pull the lever until it contacts the handlebar, hold it there and open the syringe plunger so fluid flows down from the reservoir. Close the nipple again and let the lever return fully. Repeat until the lever stays firm and no air comes down into the syringe.
Push slowly. Rapid pumping chops a bubble into a cloud of tiny ones, and micro-bubbles are far harder to shift than one big bubble. That is the single most common reason people finish a bleed with a lever that is better but not right.
Purge Trapped Air From the Caliper
The hardest bubble is the one sitting against the top of a caliper piston bore. Position the caliper so that bore is at the top, then tap the body of the caliper and the hose with the handle of a screwdriver or a plastic tyre lever. Do not hit it hard enough to damage the mount.
Some riders strap the lever on and bounce the bike gently on its tyres to shake bubbles loose. It is crude, and it works well enough on a brake that is only slightly soft. Keep the fluid level high in the funnel while you do it, because the alternative is pulling air into the hose to replace what you just pushed out.
Repeat the lever-and-fluid cycle until two or three consecutive cycles bring back no air and the lever feels the same at rest as it does under a hard pull. That equality is the actual test of a good bleed.
Close the System and Reassemble
Once fluid comes back solid, close the syringe plunger and take the syringe off the caliper while the bleed nipple is still open enough to let the level settle. Then close the nipple firmly by hand. Do not use a wrench and do not overtighten: a rounded or stripped bleed nipple is a slow, expensive leak.
Wipe every drop off the caliper, hose, frame and rotor with a rag, then a clean alcohol pass over the rotor and pad contact areas. Fluid on a rotor kills braking, and a rotor that has absorbed oil may need replacing rather than cleaning.
Remove the bleed block, push both pistons fully back with the old pad or a pad spreader, and refit the pads. The pistons have to retract fully or the caliper will drag on the new pads. Refit the wheel, make sure the caliper and rotor are centred in the mount, and torque the mount bolts to the spec in your manual rather than as tight as you can get them.
Test the Brake Before Riding
Squeeze the lever hard and hold it. If it creeps toward the bar, fluid is getting past the seals somewhere and the bike is not rideable. If it stays firm and reaches the bar within a finger’s width of travel, the pressure is building where it should.
Spin the wheel and check the rotor runs without visible wobble and without the pads touching. Then walk the bike at walking pace and squeeze each brake in turn. Both levers should feel identical and bite at roughly the same point.
If the pads are new, bed them in with 15 to 20 controlled stops from about 30 km/h before anything faster. Fresh pads need heat cycling to transfer a layer of material onto the rotor, and skipping it gives you a weak bite on the first descent of the day.
Common Mistakes
Almost every failed bleed comes down to one of a handful of habits. Here is what goes wrong and what to do about it.
- Wrong or mixed fluid. Mineral oil into a DOT system, or DOT into a mineral system, swells the seals and will not clear on its own. Drain and flush the whole system with the correct fluid, twice through, before you bleed it. Check the bottles and keep them labelled.
- Loosening the wrong fitting. The bleed nipple is the small screw with a rubber cap, usually on the caliper body. If fluid starts leaking from the banjo fitting where the hose meets the caliper, you have cracked the wrong bolt. Put it back to spec and find the nipple.
- Leaving air at the lever. If the funnel or syringe tip sits deep against the reservoir wall, bubbles cling there and never leave. Keep the tip centred in the chamber and keep the fluid level above it.
- Over-tightening the bleed screw. Once it is closed it only needs to be snug. Too much torque rounds the head, and the next person cannot remove it either.
- Bleeding over the pads. If you bleed without a block or spacers and fluid reaches the pads, they are finished. This is the most expensive avoidable mistake in the whole process.
- Riding before testing. A brake that was just bled, or a lever that still moves when it should not, gets ridden to the shop. Walk it first, every time.
On maintenance: bleed once a year as routine service, and any time the lever feels soft, the pads or rotor are off, the brake has been open, the bike has been transported or stored on its side, or the lever took a knock in a crash. Long summer descents bake fluid and draw moisture through the seals, which is why brakes that were crisp in spring feel vague by September. Reading the colour in the reservoir on mineral oil levers is a rough service indicator: darkened fluid with a brown edge is fluid that should have been replaced, not topped up.
Not every case needs a full bleed. A lever-only top-up works after a bike has been laid on its side or shipped, where the soft feeling came from a small bubble at the reservoir. A reverse flush pushes fluid down from the top to the caliper through a hose, and it clears fluid that has gone dark and gummy. Gravity bleeding, where fluid is allowed to fall from the lever through the hose, works for a minor bubble but will not shift air stuck against a piston bore. If you are at the shop stage and the lever still has a long, progressive feel, work through the leaks, contamination, piston return and trapped reservoir air in that order before you buy anything.
Frequently Asked Questions
Should I bleed my brakes with the reservoir cap on or off?
Bleed with the reservoir cap off on almost every road brake, so air above the fluid can be displaced instead of trapped. Two exceptions exist: some Shimano flat-bar levers are bled with the cover on because the reservoir rotor stirs the fluid, and sealed electronic or integrated units have no removable cap at all. Check your lever manual if you are unsure, and never force a cover that does not clip off.
Can you just gravity bleed hydraulic disc brakes?
A gravity bleed works for a small bubble that made the lever soft after the bike was laid down or transported, because you are letting fluid fall from the lever and push air out of the caliper. It will not move air stuck against a piston bore, and it will not replace dark or water-contaminated fluid. If the lever has a progressive, doughy feel rather than a small dip, do a proper bleed instead.
Why are my brakes still spongy after bleeding?
Work through four things in order. Check for fluid leaks at the nipple, banjo fitting and lever body. Check whether pads or rotors are contaminated, which can feel like air but is not. Confirm the pistons retract fully after the block is removed. Finally, look for a bubble trapped at the reservoir, which usually means the funnel or syringe tip was sitting too low. A warped rotor also feels vague and is often mistaken for air.
Do I need to remove the brake pads to bleed hydraulic disc brakes?
Yes, on almost every brake. Remove the pads and insert a bleed block or pad spacers so fluid goes to the top of the caliper instead of flooding the pad bores, and so fluid never touches friction material. A few Shimano flat-bar levers have pistons that a block cannot reach; those manuals describe a lever-only bleed with the pads left in place.
How often should you bleed hydraulic disc brakes?
Treat it as an annual service, and bleed sooner whenever the lever feels soft, the pads or rotor have been removed, the brake has been opened, or the bike has been transported or stored on its side. Prolonged descents and hot weather draw moisture in and age the fluid faster, so bikes ridden hard in summer often want a bleed every year rather than every second one.
How do I activate an ABS pump to bleed bike disc brakes?
There is no ABS pump on a bicycle. That procedure belongs to cars, where a hydraulic modulator circulates fluid under pressure. On a bike the pressure comes from you squeezing the lever, or from gravity if you are doing a lever-only bleed. If you have followed a procedure that involves cycling a pump, it is for a car, and you should look for your brake manufacturer’s manual instead.
Start With a Safe, Complete Bleed
Find out what fluid your brakes use before you open them, follow the manufacturer procedure for that lever rather than a generic one, and take your time pushing fluid. Work through the cycle until the lever feels the same at rest as it does under pressure, clean every drop off the rotor and pads, and then walk the bike at walking pace and test both brakes before you turn a wheel at speed.