Fixing a flat on a road bike takes four moves: take the wheel off, unseat one side of the tire, swap or patch the inner tube, then put everything back at the right pressure. The first time takes 30 to 45 minutes. After two or three goes, most riders knock it out in 15 minutes beside the road.
That sounds simple, and it is. What actually stops people is the bead not wanting to go back on the rim, and the disc brake lever getting squeezed when the wheel is out. Both are avoidable once you know what is happening.
How to fix a flat tire on a road bike comes down to knowing which of two setups you are running. Clincher tires with an inner tube are what most road bikes have, and tubeless setups work differently. Pick the path that matches your tires and ignore the other.
Table of Contents
- What You Need
- Step-by-Step: How to Fix a Flat Tire on a Road Bike
- 1. Move to a safe place and inspect the tire
- 2. Remove the wheel from the bike
- 3. Remove one tire bead and inspect the inside of the tire
- 4. Find the leak and patch or replace the tube
- 5. Reinstall the tube or plug and seat the tire
- 6. Reinstall the wheel and check the repair
- 7. Replace the tube or tire when a simple patch is not enough
- Common Mistakes
- Frequently Asked Questions
- How long does it take to fix a flat tire on a road bike?
- Can I patch a flat bike tire at home?
- How do I get a stubborn tire bead back on the rim?
- Do tubeless road bike tires need a different repair method?
- What do I do when I cannot find the puncture?
- Get back riding safely
What You Need
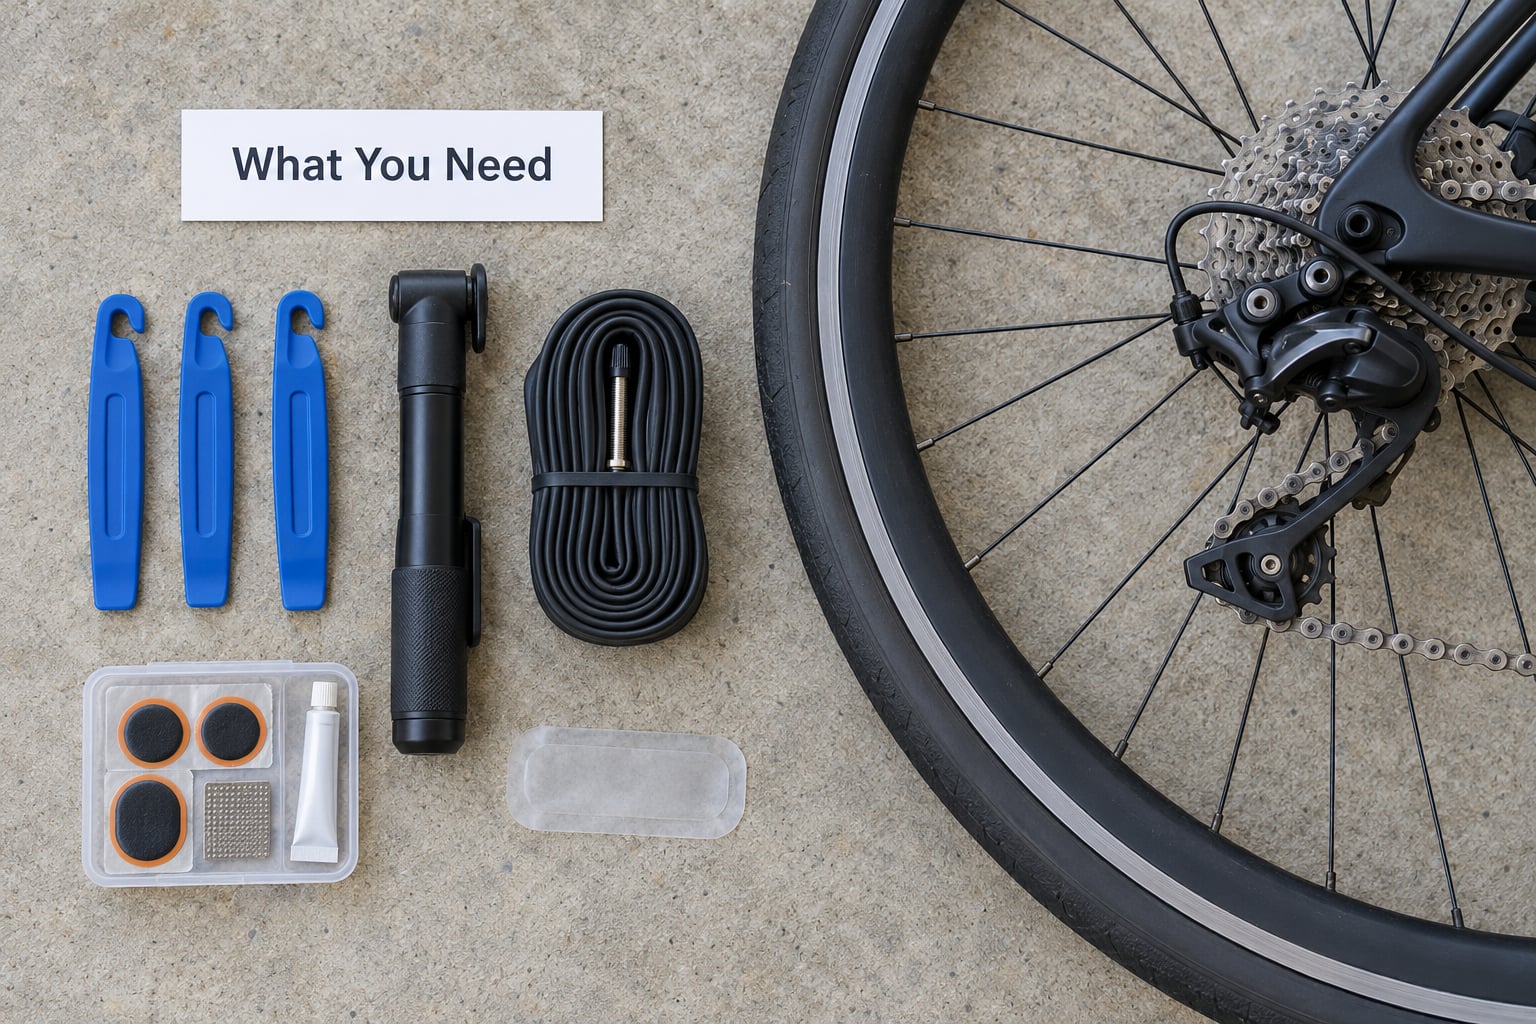
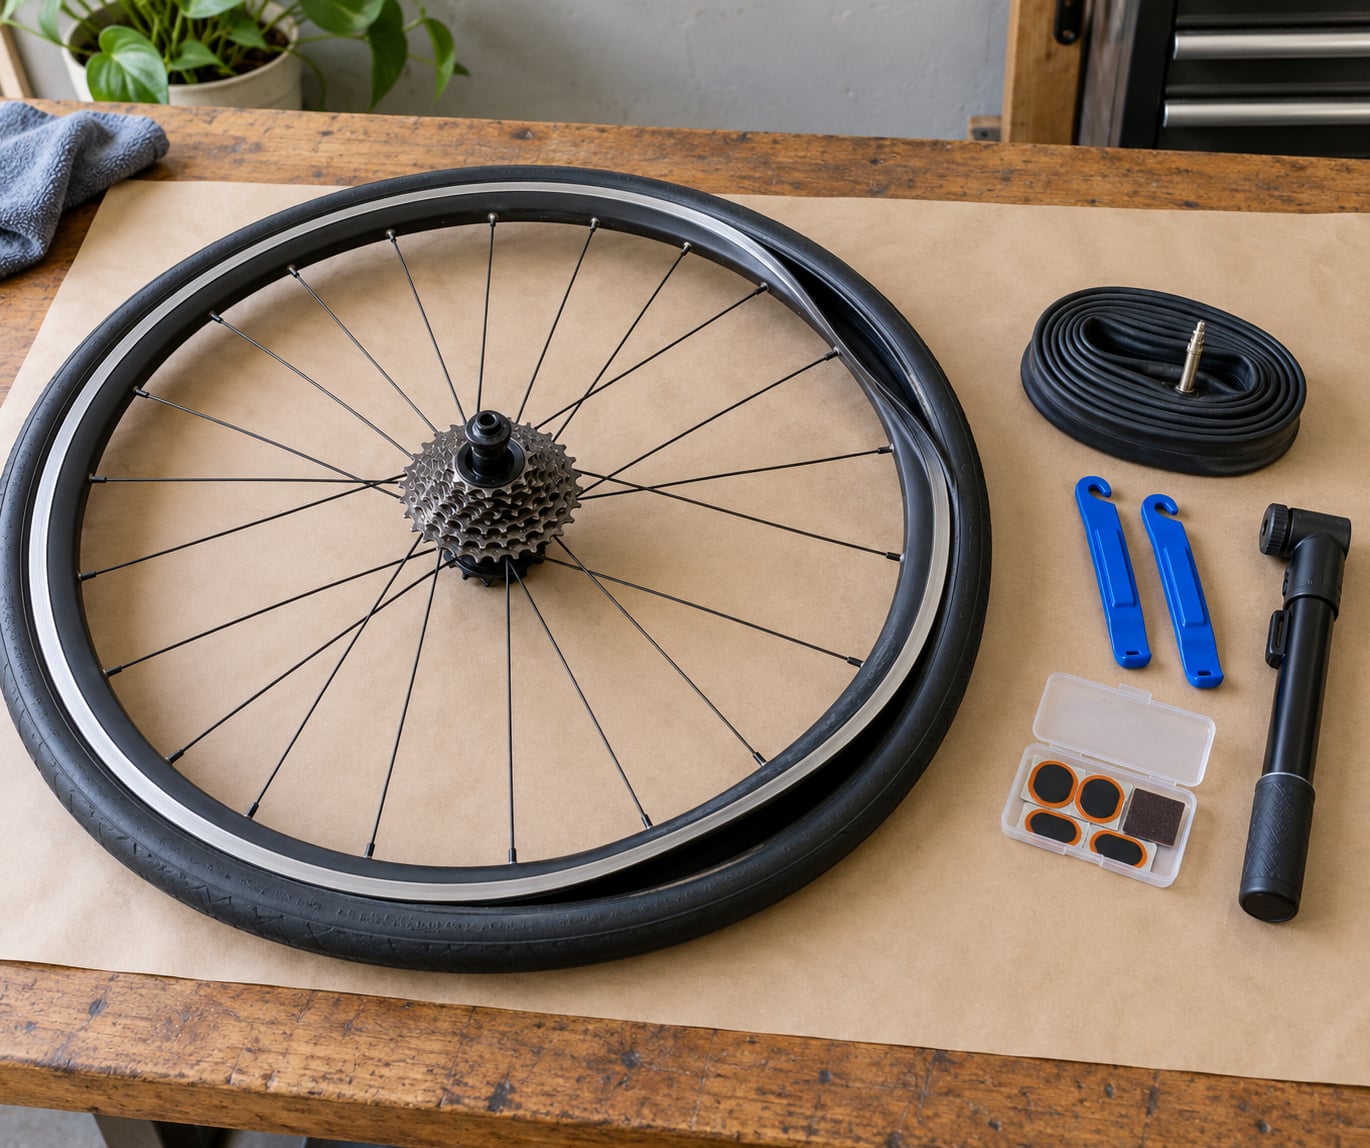
Roadside kit, the non-negotiable items:
- A spare inner tube in the right size and valve type for your wheels
- Two tire levers, plastic so you do not damage the rim
- A pump that can reach road pressure, which means a mini floor pump or a high-volume mini pump rather than a tiny frame pump
- A multitool, mainly for the valve nut and, on some bikes, the brake release
Useful at home, not worth carrying:
- A patch kit with metal scuffing plates and vulcanizing fluid
- A tire boot for sidewall cuts
- A tubeless plug insertion tool if your tires are tubeless
- A tubeless sealant bottle if you top up sealant regularly
- A pressure gauge, which matters more than most riders expect
Carry the spare tube and the levers. That really is everything you need to know how to fix a flat tire on a road bike beside the road. The rest can wait for a garage at home.
Step-by-Step: How to Fix a Flat Tire on a Road Bike
1. Move to a safe place and inspect the tire
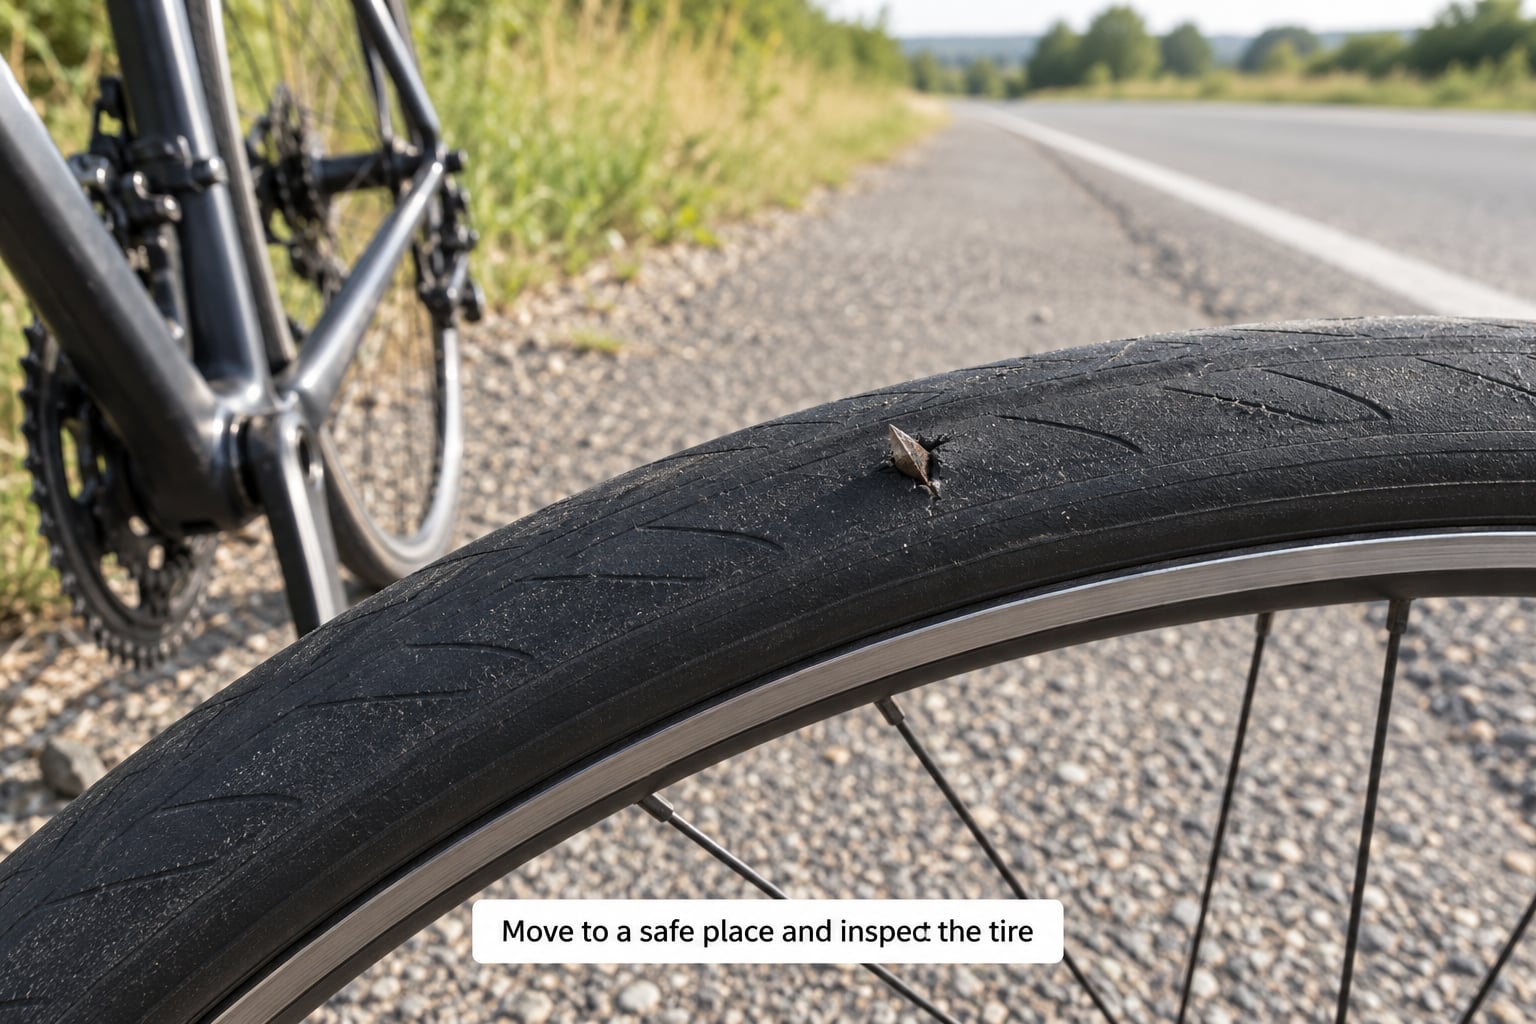
Get off the road first. Walk the bike to a driveway, a parking lot, a wide shoulder or grass before you touch anything. A repair at the roadside is only worth doing where a car cannot hit you while you are bent over.
Look at the tire before you take the wheel off. Squeeze the tire around the rim and feel for a sharp object still buried in the tread. Glass and thorns sit right there on the surface, and pulling the tube first then finding the glass still in the tire is the number one reason a fresh tube goes flat again the next morning.
Next, judge how bad the flat is. Press the tire down: firm everywhere means you probably have a slow leak and some riding distance in hand. Squash or hissing air means the tire is losing pressure fast. Check the rim edge too, since a cut sidewall looks different from a tread puncture, and run a finger along the bead to confirm it is still seated evenly all the way round.
Success check: you know whether this is a small hole, a blowout, or a slow leak, and you are not standing in traffic.
2. Remove the wheel from the bike
Shift to the smallest cog at the rear first. That slackens the chain so it will not fight you when the rear wheel drops out of the dropouts.
Front wheel with rim brakes: squeeze the brake arms together to release the caliper or cantilevers, which lets the tire clear the brake pads. Front wheel with disc brakes: nothing to release, but do not touch the rotor.
Rear wheel with rim brakes: squeeze the brake arms, then open the quick-release skewer or undo the through-axle. Rear wheel with disc brakes: undo the axle and keep the spacers in order, since that is where the axle position is set.
On disc brake bikes, do not squeeze the brake lever with the wheel out. The pads close on empty air and stay that way, and the rotor will not fit back between them. If it happens, a plastic pad spacer or the handle of a multitool wedged between the pads brings them apart.
Success check: the wheel lifts straight out of the dropouts with no force and no twisting.
3. Remove one tire bead and inspect the inside of the tire
Deflate the tire completely. Unscrew the Presta valve nut and press the valve core to let the last air out. Squeeze the bead into the middle of the rim well to release it from the bead seat.
Hook one tire lever under the bead, then leave it hooked on a spoke and run it around the rim. Use the second lever only to lift the next section. Pulling both levers against each other is how people pin the tube and make a flat flat.
Now the inspection. Feel inside the tire with a fingertip, not just look. Run your finger around the whole circumference looking for anything sharp, because that is the debris that caused the flat. Check the rim tape, which covers spoke ends and the valve hole, and check that the bead has no cuts or fraying. Also look at the valve stem itself, since a valve that no longer holds air gives you a flat with no visible hole.
One side off is enough. You never need to remove both beads to change a tube.
Success check: the tire is open on one side, the rim strip looks intact, and you know where the damage is.
4. Find the leak and patch or replace the tube
With a clincher tire, pull the tube straight out of the tire starting opposite the valve and working around to it. Do not twist it, and do not scrape it against the rim.
Find the hole. Listen, or hold the tube near your ear and run water over it until you see bubbles. Or inflate it slightly, press it against a cheek or the inside of your elbow, and feel for the escaping air. A rubbing sound that changes as you move along the tube is a reliable method when you have no water.
Inflate the tube, then soak it in soapy water or run soapy water over it. Bubbles mark the hole. Pinpoint leaks also show up as a hiss you can hear before you can see anything.
Now choose your fix.
Patch it when the hole is small and away from the valve. Find the hole in the tire first, then roughen the tube around the hole with the scuffing plate until it is matte. Put a thin coat of vulcanizing fluid on, wait until it turns tacky and no longer glossy, then press the patch down hard and wait a few minutes before inflating. A pinch test is simple: inflate the patched tube and press the patch from the other side. No air means it holds.
Replace it when the hole is larger than a couple of millimetres, when it sits next to the valve, or when you are not confident the patch will hold. Carrying a spare tube is faster and more reliable than patching in a lay-by with cold hands.
For tubeless tires there is no tube to swap. You have already pulled any debris out of the tire, so plug the hole from the inside with a tubeless plug, or add sealant and spin the wheel if the hole is small. Sealant only reliably closes pinholes, so a cut that keeps leaking needs a plug and then a proper tire at home.
Success check: the new tube holds air on its own, or every leak in the tire is accounted for.
5. Reinstall the tube or plug and seat the tire
Give the new tube one or two puffs of air so it holds its shape rather than sitting flat and folded. Tuck it into the tire with the valve stem straight up, feeding it in at the valve and working around the tire.
Put the valve stem through the hole in the rim tape first, then feed the rest of the tube around. If the tube twists as you go, pull it back out and start again, because a twisted tube pinches and bursts.
Start the bead at the point on the rim opposite the valve and work both directions toward the valve at the same time. If a lever keeps slipping, pinch the tire into the rim well so it sits below the bead seat and use your thumbs. This is the single trick that turns a frustrating twenty minutes into a thirty-second job.
Finish at the valve stem, which usually needs the last firm push by hand, then inflate a little. Watch the bead line as you pump. When a heavy round tire is pumping up, the bead appears to vanish at the widest point. That is normal.
Inflate to about 25 psi and check the bead all the way round. If part of it is sitting proud of the rim, deflate and push that section down with your thumbs, then pump again. Never use a lever to force a bead home at this stage.
For tubeless, press the beads into the rim well, add a few hard pumps to push the bead up, then top up the sealant if the level has dropped.
Success check: the bead is even and tight all the way round, with no gap and no visible tube under the bead.
6. Reinstall the wheel and check the repair
With rim brakes, hook the wheel into the dropouts before you let go, then release the brake arms so the tire sits between the pads. Close the quick-release or tighten the through-axle firmly. A quick-release lever should feel like the back of your hand when shut, not a light switch.
With disc brakes, guide the rotor into the caliper straight, never at an angle, and check that both arms of the fork or frame sit in the dropouts. Then look at the rotor from the side. If it is not straight, the wheel is not seated. Never squeeze the lever with the wheel out, and never touch the rotor with bare fingers.
On a rear wheel, lift the chain back onto the smallest cog before you tighten anything. A chain on the wrong cog will jam the derailleur and it may not shift at all.
Now do the checks that catch the problems riders complain about. Spin the wheel and watch the gap between rotor and caliper pad. Squeeze both brakes and confirm the wheel locks. Run through the gears. Then run your thumb along the bead one more time, all the way round, at road pressure.
Success check: the wheel spins true, the brake lever feels firm, and the gears shift without hesitation.
7. Replace the tube or tire when a simple patch is not enough
Some damage cannot be patched. Change the whole tire if you find a cut in the sidewall or the bead, if the tire has a visible bulge or split, or if you have had three or more punctures in the same tire. The casing is damaged and the next failure is not far behind.
For a sidewall cut you can sometimes get home on a boot. A tire boot is a thick patch of rubber or plastic shaped to fit inside the tire and cover the cut. Trim it to size, sand the area, apply vulcanizing fluid, press the boot over the damage from the inside and let it set. If you have nothing else, a folded piece of a dollar bill or a gel wrapper works in a real pinch, and a thin smear of shoe glue helps hold it.
Replace the tube when the valve stem is damaged or will not hold air, when the cut is inside the tire near the bead, or when the same tube has already been patched twice.
Getting a proper tire fitted is a shop job if the rim is damaged, the bead will not hold, or the cut runs the length of the sidewall. No roadside trick fixes a cracked rim.
Common Mistakes
Squeezing the brake lever with the wheel out. On disc brake bikes this closes the pads on nothing and the wheel will not go back in. Put a spacer in the pads while the wheel is out and leave it there until the wheel is home.
Pinching the tube with the lever. That is how a small puncture becomes a shredded tube. Hook one lever, anchor it on a spoke and use the second only to lift.
Leaving the debris in the tire. Find and remove the thorn, glass or wire before the new tube goes in, and run a finger around the casing to be sure. Finding it takes a minute; replacing a second tube on the ride home takes twenty.
Overinflating a tubeless tire to seat the bead. The bead seats at low pressure and rises as you add air. Slamming a tubeless tire to full pressure to force the bead up can blow it off the rim. Use a few firm pumps.
Skipping the rim tape check. A shifted rim strip exposes spoke ends and the valve hole, and those cut tubes on every ride. Press it back into place, or replace it before it eats another tube.
Riding a road tire below its pressure. Road tires run far higher than mountain bike tires, usually in the range printed on the sidewall and often somewhere between 80 and 100 psi. Run one low and the rim edge can pinch the tube, which is called a pinch flat or snake bite. Check the printed range on the sidewall and set pressure to your weight and tire width before every ride.
Not finding the cause of a repeat flat. If a fresh tube goes flat within a few days, something is wrong that a new tube does not fix. Check for debris again, check the rim tape, check that the rim is not bent, and consider whether the tire itself has a hidden cut.
Skipping the post-repair checks. Weak disc brakes after a change are almost always a lever squeeze or a misaligned wheel. Gears that will not shift are almost always the chain on the wrong cog.
Frequently Asked Questions
How long does it take to fix a flat tire on a road bike?
Allow 30 to 45 minutes for your first roadside change, mainly because finding the cause and getting the bead back on are slow while you learn. Once you have done it a few times, 15 to 20 minutes is realistic, including inflation. Front wheels are quicker than rear ones because there is no drivetrain to deal with. A pump that cannot reach road pressure will add its own ten minutes.
Can I patch a flat bike tire at home?
Yes, patching works well for small holes away from the valve. Roughen the rubber around the hole with the scuffing plate, apply vulcanizing fluid, wait for it to go tacky, press the patch on firmly and give it a few minutes to set. Patch when you are at home with a kit and time. Roadside, a spare tube is faster and more dependable, especially in cold or wet conditions.
How do I get a stubborn tire bead back on the rim?
Deflate more than you think you need, squeeze the tire down into the middle of the rim well so it sits below the bead seat, then start the bead at the point opposite the valve and work both directions toward the valve at the same time. A well-packed bead often goes back on with thumbs alone. If you must use a lever, use it only for the last stubborn centimetre by the valve.
Do tubeless road bike tires need a different repair method?
Yes. There is no inner tube to replace, so you pull any debris out of the casing, then either plug the hole from the inside with a tubeless plug or top up sealant and spin the wheel. Sealant only closes small pinholes reliably, so a larger cut needs a plug and a new tire soon after. Check the tire and rim are tubeless-compatible before starting.
What do I do when I cannot find the puncture?
Inflate the tube and listen for a hiss you can hear before you see, or listen, then press the inflated tube against your elbow or cheek to feel escaping air. Inflate to a firm pressure, find the general area, then wet the tube with soapy water to pinpoint it. If nothing shows, the tube is usually the problem: swap it for a spare and recheck the tire carefully for debris.
Get back riding safely
Start every flat by working out whether your tires take a tube or sealant, then find the cause before you fit anything. Carry a spare tube in the correct valve type, two levers and a pump that reaches road pressure on every single ride, whatever the forecast.
Before you set off again, spin the wheel, squeeze both brakes, shift through the gears and run your thumb around the bead at full pressure. If the tire is holding air after a few minutes, the repair held.
A sidewall cut or a bead that will not hold is a replacement, not a patch. Ride to the shop or call for a lift rather than trusting a boot, and keep riding the same route afterwards only when the tire is back at pressure.
Practise once at home on a weekend with an old wheel and a spare tube. That twenty minutes makes the first roadside flat an inconvenience instead of an ordeal.