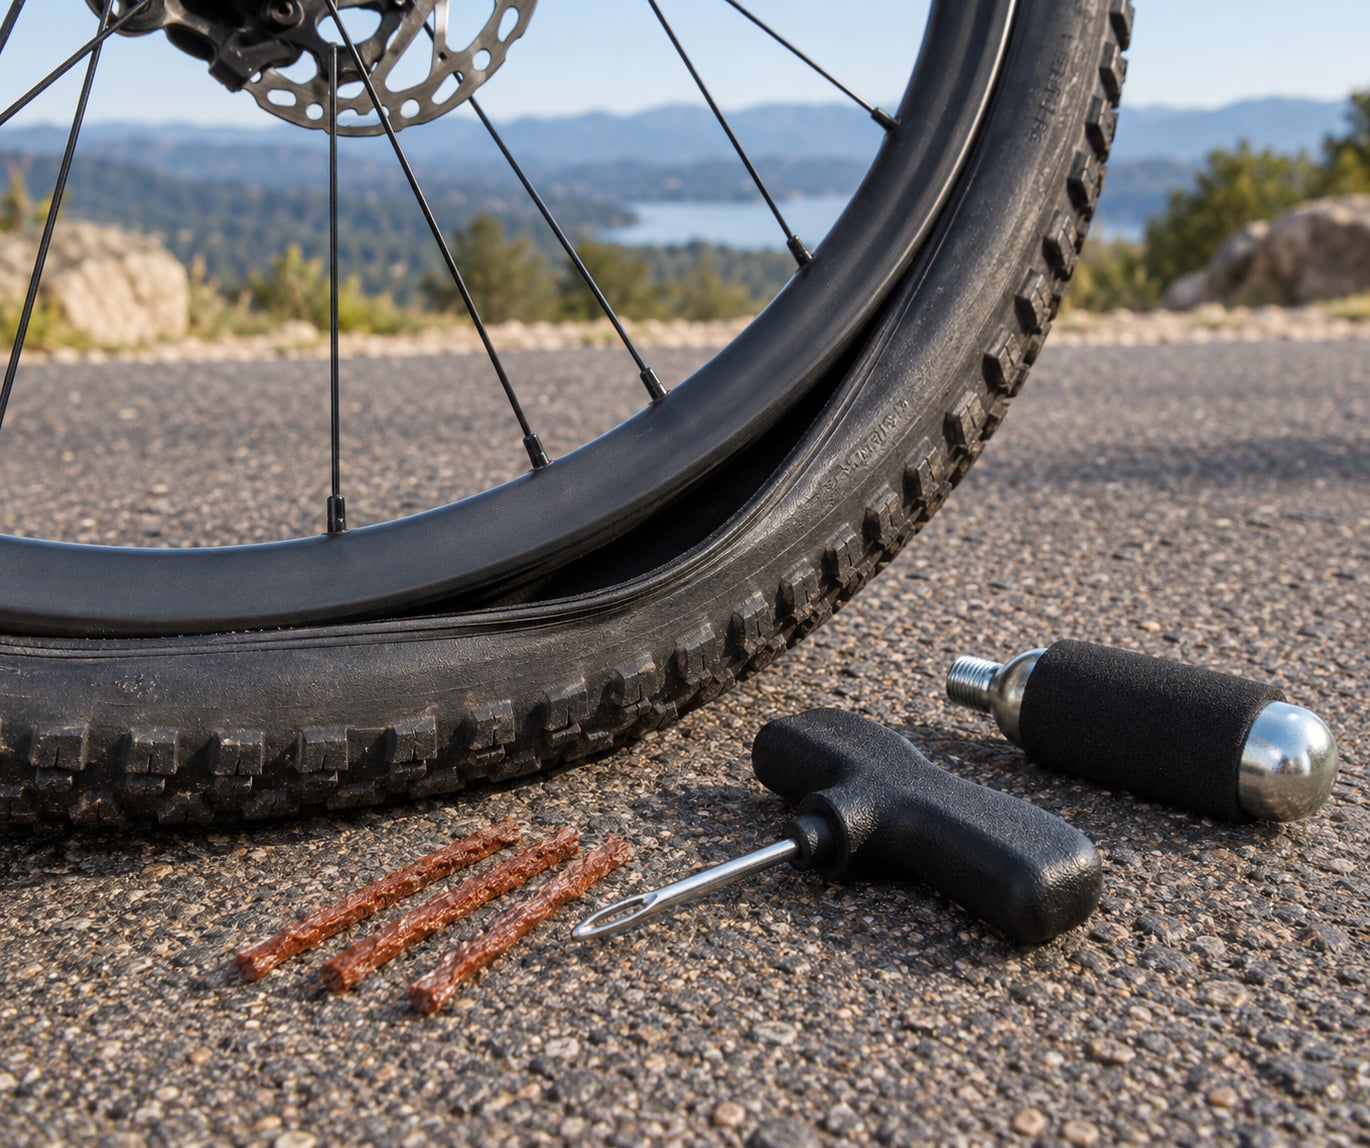
A tubeless flat on the road is usually a five-minute job: get off the road, find the hole, ream it, push a sticky rubber strip through it with a plug tool, and reinflate. The liquid sealant inside the tire has already handled every smaller puncture on its own, so if you are standing next to a fully soft tire, the hole is too big for sealant and needs a physical seal.
What makes tubeless different from a clincher is what happens when the repair fails. There is no tube to swap out by default, and road pressure sits far higher than most people expect. That is why I treat a spare inner tube and a CO2 cartridge as standard kit rather than emergency-only gear.
Below is the full roadside sequence, then what to do when the tire still will not hold air. The short version first: find the leak, pull the debris out, clean and ream the hole, insert the plug with the tool angled away from the rim, trim the tails flush, and inflate in short bursts while watching the bead line.
Table of Contents
- What You Need to Fix a Tubeless Flat on the Road
- Step-by-Step Roadside Tubeless Repair
- Move the Bike and Assess the Flat
- Find the Leak Before Removing the Tire
- Remove the Object and Plug the Hole
- Check the Bead and Inflate the Tire
- How to Fix a Tubeless Flat on the Road When It Will Not Hold Air
- Common Mistakes and Tips for a Lasting Repair
- Frequently Asked Questions
- Can I patch a tubeless tire with a regular tire patch?
- How much air pressure should I use after plugging a tubeless tire?
- What size tubeless plug should I use for a thorn hole?
- Should I remove the valve core before using a CO2 cartridge?
- How long can I ride on a tubeless plug?
- When should I install a spare tube instead of repairing a tubeless tire?
- Conclusion: Seal the Leak and Ride Safely
What You Need to Fix a Tubeless Flat on the Road
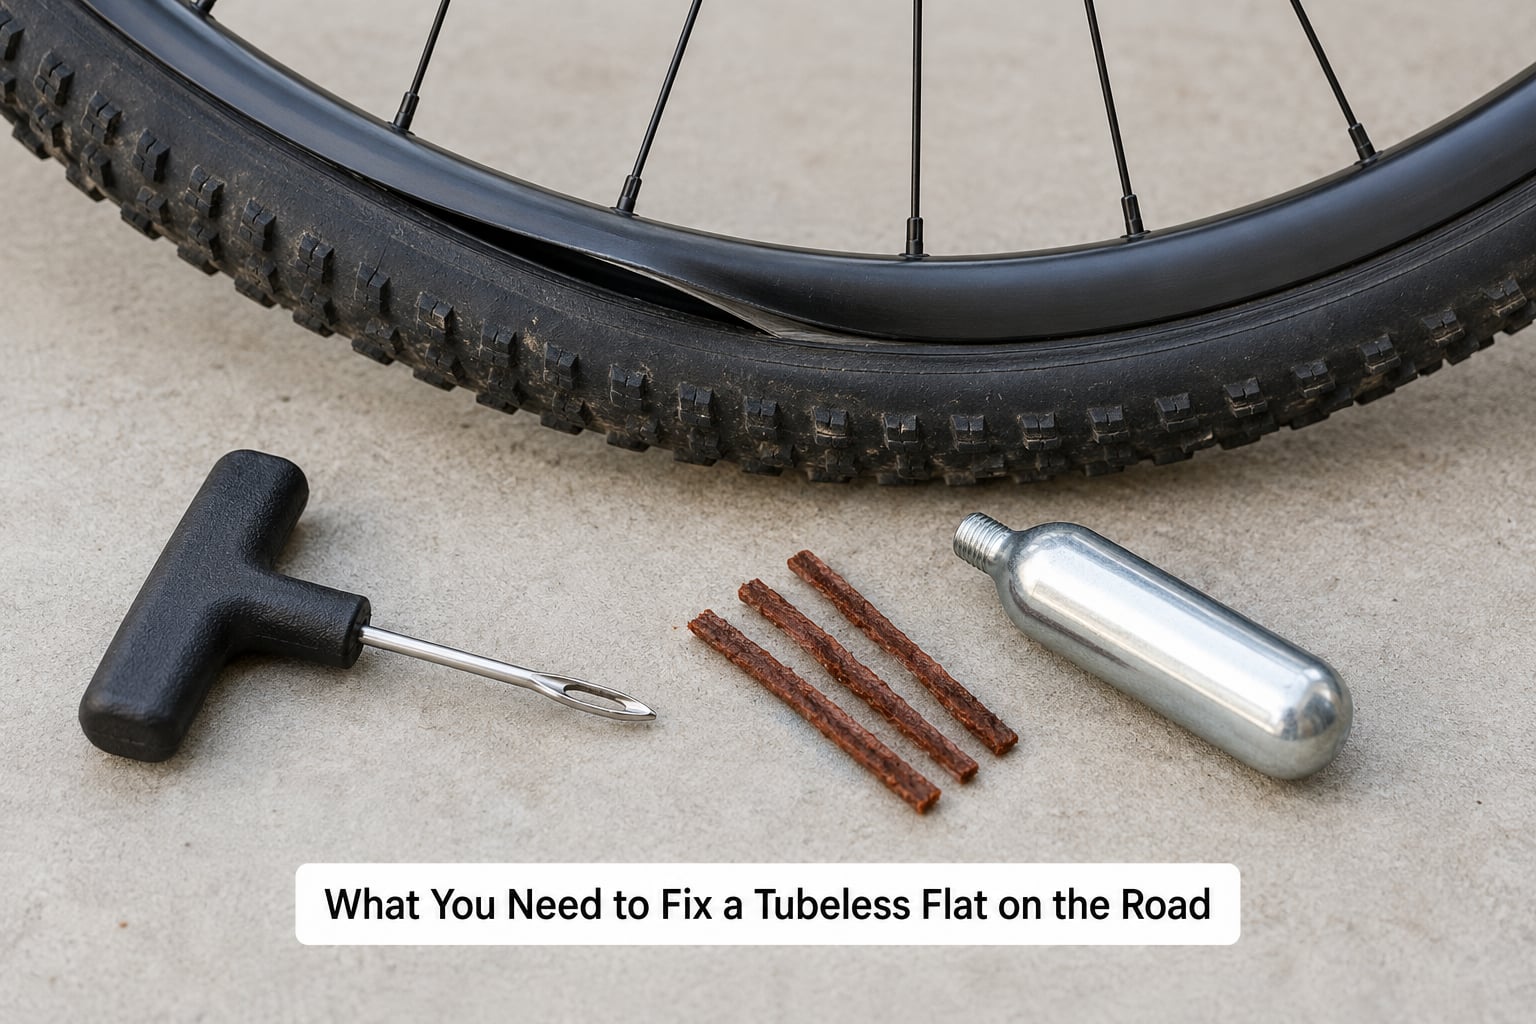
A tubeless flat repair kit is small enough to live in a jersey pocket or a top-tube bag. Weight matters less than having the tool you need while standing in the rain next to a dark road.
These four items are the core of the kit:
- Tubeless plug strips. Carry more than you think you need. Five or six strips, a mix of thin and thick, costs almost nothing.
- An insertion tool with a reamer on the other end. Dynaplug-style tools and Stan’s Dart do both jobs. A strip on its own is nearly useless because you cannot ream or drive it in cleanly by hand.
- An inflator. A mini pump with a tubeless-compatible head or a CO2 inflator with a threaded connection, plus at least one 16g or 25g cartridge.
- A spare inner tube of the right width. The insurance policy. Riders on credit-card tours report being glad they had one when a plug would not seal.
Useful extras that most people skip and then regret missing:
- A valve core remover, which is tiny and lets you dump pressure fast or top up sealant through the valve.
- A rag or small towel. You will touch rubber and wet sealant, and it protects your hands while you handle the plug strips.
- Tire levers and a small multi-tool with a chain breaker, in case the real problem turns out to be under the tread.
- A roll of duct or fabric tape for the emergency internal boot that nobody plans for.
- A second, smaller plug — a 2 mm strip is easy to carry and will seal a small cut that a 3.5 mm strip will not reach.
One note on plug types. Cheap self-adhesive “worm” strips in a folding key ring feel like they should work, and they do hold for gravel pressures. On a road tire at 70 to 100 psi, riders on the Weight Weenies forum report pushing them back out within a few kilometres. A proper insertion-tool plug spreads the pressure across the casing plies instead of hanging on the plug’s own grip, which is the difference between finishing the ride and changing a tube ten miles later.
That said, the tools are the nice-to-have. The thing that reliably gets you home is a cheap butyl tube and a CO2 cartridge. Forums are split on nearly everything else and agree on that.
Step-by-Step Roadside Tubeless Repair
Move the Bike and Assess the Flat
First, get yourself somewhere safe. Walk the bike off the shoulder, off the cycle lane, away from a junction. You are not fixing a tire while standing in a live traffic lane, and a repair done badly under pressure takes longer than walking.
Turn the bike so it sits stable, usually with the drivetrain on the opposite side from your working hand. Then look at the tire before you touch anything. A round hole in the tread is a thorn or a piece of glass. A long gash, a rubber flap, or a visibly pinched bead is a different repair entirely.
This is the moment to decide if you are riding a replacement tire home or fixing this one. Plug a puncture and ride the rest of the day. A cut, a sidewall bubble, or a pinch flat where the tire was crushed against the rim between two hard impacts will not plug, and pushing on a deflated road tire chews the rim and the casing.
Find the Leak Before Removing the Tire
Most roadside repairs start with listening. Squeeze the tire and hold it near your ear, or run your hand along the tread while pressing the casing. Air escaping from a single hole makes an audible hiss, and you can feel the jet of air against a fingertip or a wet cheek.
If the hiss is hard to pin down, add a drop of water to the suspected spot or hold a strand of hair against the tread. Bubbles or movement confirm it.
While the tire is still mounted, run your fingers around the whole tread looking for glass glinting in the rubber, and along the sidewalls for a cut or a bubble of casing that has separated from the bead. Also check the rim bed itself — a rim strip that has slipped can look like a puncture that nothing will fix.
You do not need to remove the wheel to find a puncture, and keeping it on the rim makes the repair much easier. If you have to unseat the bead later, it will be because you need to boot the hole or fit a tube, not because you needed to find the leak.
Remove the Object and Plug the Hole
Pull the debris out with a tool rather than your fingers. Glass cuts fingers, and if a thorn breaks off and stays buried inside the casing, the hole will keep weeping.
Clean the hole. Dirt and dried sealant on the surface stop the strip from bonding to the rubber, and a strip that does not bond is a strip that blows out later. Scrape it with the tool tip or the edge of your rag.
Then ream it. The reamer end of the tool is a small file; work it in and out of the hole six or eight times to roughen the edges and open the casing plies slightly. Skip this and the strip slides straight back out.
Load the strip into the insertion fork, leaving a couple of centimetres of tail sticking out the back so you have something to pull on. Push the fork into the hole at a gentle angle, leaning away from the rim so the strip does not travel toward the tire bed where it could be trapped by the bead. A shallow angle, roughly 15 degrees off straight, is what most people end up using once they stop forcing it.
Screw the tool handle down firmly, then pull it straight back out. The strip should stay behind, bridging the inside of the casing with a tail on each side. Trim both tails flush with the tread using a sharp knife or the blade of your multi-tool. Leave them long and they will snag on a pedal, the cranks, or a pothole edge and pull the plug straight out.
If the first strip does not hold, the fix is usually a second strip rather than a bigger one. Twist two thin strips together, or insert them at a different angle from a different point on the hole. If the cut is longer than a strip can span, stop plugging and boot it from the inside.
Check the Bead and Inflate the Tire
Before you inflate, look at the bead all the way round the rim. Both beads should sit evenly below the rim wall. If you used a pump to get the tire off, a section of bead may be sitting proud and will pinch the tube or the plug when you push it up.
Inflate in short bursts and stop to look at the bead line rather than pumping straight to riding pressure. On a tubeless setup, the bead needs to roll into place as pressure builds, and watching the sidewall shows you whether it is seating or whether one side is lagging.
CO2 inflates a road volume quickly and is my preference when the cartridge is fresh. A 25g cartridge brings a 28 mm road tire from flat to riding pressure, and the gas is already at ambient temperature so there is no slow pressure climb as the cartridge cools. Mini pumps win on weight and on giving you a final precise top-up, and a tubeless head or standard Presta chuck both work on a tubeless-ready tire.
Two pressure habits matter on the road. First, do not overshoot: go a few psi past your normal riding pressure at most, because over-inflating a hot tire or a tire with sealant still sloshing around is how you get a bead blowoff. Second, top the sealant back up through the valve before you ride away. Use the valve core remover, or the valve’s own fill port, and get the level back to the line inside the tire.
Finally, spin the wheel and listen. A hiss or a bubble of foam at the plug means it is not sealed; take it down and do another strip. Then check pressure again after five minutes. A plug that holds at first and fails on the ride is usually a dirty hole or a strip that was not trimmed properly.
How to Fix a Tubeless Flat on the Road When It Will Not Hold Air
If the tire is still soft after a plug, or the plug works loose on the ride, stop repairing it and convert to a tube. This is the point where riders get carried away and end up with a destroyed rim at the side of a road.
Remove the wheel, deflate the tire fully, and unseat one bead with your hands if you can. A plastic tire lever helps on tight road rims, but go easy with a metal lever on a carbon or alloy road rim because it can damage the rim wall or the brake track. Unseat only one side; you never need to take the tire completely off.
With the bead off, pull out every used plug strip and check what you are dealing with. A long cut gets an internal boot — an old piece of tire cut into an hourglass shape, a folded strip of tape, or a piece of a discarded tube — with sealant smeared around it. Push the boot inside the tire so the narrow waist sits over the cut.
If you are going to a tube, check the rim tape first. Tubeless setups often run a thicker rim tape, and pressure from a hard pump unseated onto a nipple can split it or leave it with a gap. Cover any exposed spoke hole with tape before the tube goes in.
Take the valve core out with your fingers or the core tool if you want every last drop of speed out of the tube, and because a trapped core can hold a slow leak. Inflate the tube to a light shape, not to riding pressure, so it does not stretch and pinch. Install it with the valve straight and the nut hand tight, then work the bead back on starting opposite the valve and finishing at the valve so you can control tension there.
Set pressure at or below your normal range with a tube inside, since the tube and tire together are stiffer than tubeless at the same number. Ride home at a moderate pressure and finish the repair properly at home.
Do not ride home on a deflated or half-flat road tire. With no air, the rim is being used as a suspension piece and every pothole edge can bend or crack it; a cut that keeps bleeding sealant at the rim may also be separating the casing from the bead. Walking a mile is cheaper than a new wheel.
Common Mistakes and Tips for a Lasting Repair
Almost every roadside tubeless failure comes down to one of these, and none of them are complicated.
- Skipping the ream. The reamer is not optional. A hole with slick edges will not grip the strip, and the plug leaves on the first hot climb.
- Plugging a hole that is still dirty. Dried sealant and road grit block the bond. Clean the hole, then ream again.
- Leaving the tails long. Trim to the tread. This is the single most common cause of a plug working its way out mid-ride.
- Pushing the plug toward the rim. Angle the tool away from the bead so the strip sits inside the casing, not jammed against the tire bed.
- Over-inflating to make it feel safe. Sealant and a warm rim mean more air reads lower than the number on the gauge. Add pressure in steps and recheck.
- Removing the valve core when you did not need to. It saves a few seconds and can leave you with a slowly weeping valve. Leave it in unless you are fitting a tube or actively bleeding pressure.
- Riding far on a tire that never held pressure. Once you have converted to a tube, or the tire keeps losing air, the rim and casing are the weak point. Ride slow, ride short, or walk.
- Carrying tools but no tube. A plug kit is not a complete roadside plan on a road tire. Add the tube and a cartridge.
- Forgetting to top up sealant. Every puncture removes sealant. Top up through the valve before you roll again or the next small hole will be your problem too.
A few things worth adding before the ride rather than during it. Practise the whole sequence once at home on a spare wheel, in daylight, with no pressure on you — that single drill removes most of the anxiety riders report about fixing a flat in bad weather.
Watch cold conditions. Sealant that sits in a cold tire for hours can clump, and dried sealant does not seal. If you ride through winter, check your sealant level more often and keep an eye on how long your setup goes between services.
And know which damage stops the ride entirely: a sidewall cut, a bubble in the casing, a damaged bead, a crack in the rim, or a tire that will not hold air at all after two attempts. Those are a call, a lift, or a walk, not a third try.
Frequently Asked Questions
Can I patch a tubeless tire with a regular tire patch?
A glue-and-patch repair is designed for butyl inner tubes, not for the rubber of a tubeless tire. The patch compound will not bond reliably to a tubeless casing, and you would have to remove the tire and rim to get at it. A tubeless plug strip is the correct roadside repair because it grips from inside the casing plies with no adhesive. Patch a spare tube instead if the tube itself is damaged.
How much air pressure should I use after plugging a tubeless tire?
Inflate to your normal riding pressure, in short bursts while watching the bead line, and do not overshoot. Road tires often sit between 70 and 100 psi depending on weight and rim width, so add air gradually and recheck with a gauge rather than guessing by squeeze. If a tube is fitted, drop a little below your tubeless number because the two together are stiffer.
What size tubeless plug should I use for a thorn hole?
Use the size that matches the hole, and carry more than one. Most road punctures from thorns or glass take a thin 1.5 to 2 mm strip, while a larger cut from a sharp edge usually needs a 3.5 mm strip or two thin strips twisted together. The strip should be fatter than the hole so it is pinched by the casing, which is what makes the seal airtight.
Should I remove the valve core before using a CO2 cartridge?
Usually not. Leaving the core in costs you a small amount of flow and saves the hassle of a loose core in your jersey. Remove it if you want every bit of speed out of the cartridge, if you are bleeding pressure fast, or if you are fitting a tube and want to be sure no air is trapped. If you do remove it, keep the little brass part somewhere obvious.
How long can I ride on a tubeless plug?
A properly inserted plug can last the rest of the ride and well beyond it, and many riders keep riding the same repaired tire for months. The failures that happen are usually mechanical: a long untrimmed tail snagging and pulling the strip out, or a dirty hole that never bonded. Check pressure before each leg and top up the sealant, and replace the tire when you get home.
When should I install a spare tube instead of repairing a tubeless tire?
Fit a tube when the plug will not hold after a second clean, reamed attempt, when the cut is longer than a strip can bridge, or when the tire keeps bleeding air while you ride. Also convert if the rim tape is damaged or exposed, since a tube on a bare rim will pinch. Do not keep trying on a tire that stays soft; a deflated road tire will damage the rim.
Conclusion: Seal the Leak and Ride Safely
Get clear of traffic first, then work in order: find the leak, pull the debris, clean and ream the hole, insert the plug angled away from the rim, trim the tails flush, and inflate in short bursts while watching the bead seat. Top the sealant back up through the valve before you set off.
If it will not hold, convert to your spare tube, and if the tire or rim is damaged, do not ride on it. A walking repair beats a broken wheel every time.